Migrate from Legacy FCM APIs to HTTP v1
As you may be aware, Firebase Cloud Messaging (FCM) is discontinuing their legacy API by June 2024, and they have advised all users to transition to the newer HTTP v1 API before that. This change is essential to maintain the reliability and functionality of push notifications for your mobile and web applications. Firebase states that in addition to ongoing support and new features, the HTTP v1 API has other advantages over the legacy APIs such as offering better security via access tokens and being more extendable and future-proof for new client platform versions. To comply with this update from FCM, we have incorporated the necessary changes starting with Webex Connect release version 6.5.0, which utilizes the FCM HTTP v1 API.
Action Required
If you have a mobile or web app asset that was created before Webex Connect version 6.5.0, you will need to make certain changes to ensure compatibility with the new FCM HTTP v1 API. This is crucial to prevent any disruption in your notification services once the legacy API is discontinued.
Follow the steps outlined below to update your mobile/web app asset. This document provides detailed instructions on how to migrate your assets to start using the FCM HTTP v1 API in the backend.
1. Download Service Account JSON File From Your Firebase Project
The Firebase Cloud Messaging server key allows Webex Connect to submit push notifications to your application. The following steps will provide directions for obtaining the key, please make a note of the key for use later in this guide.
- Open the Firebase Console
- Click the Firebase project to open it. (You created this in the previous section)
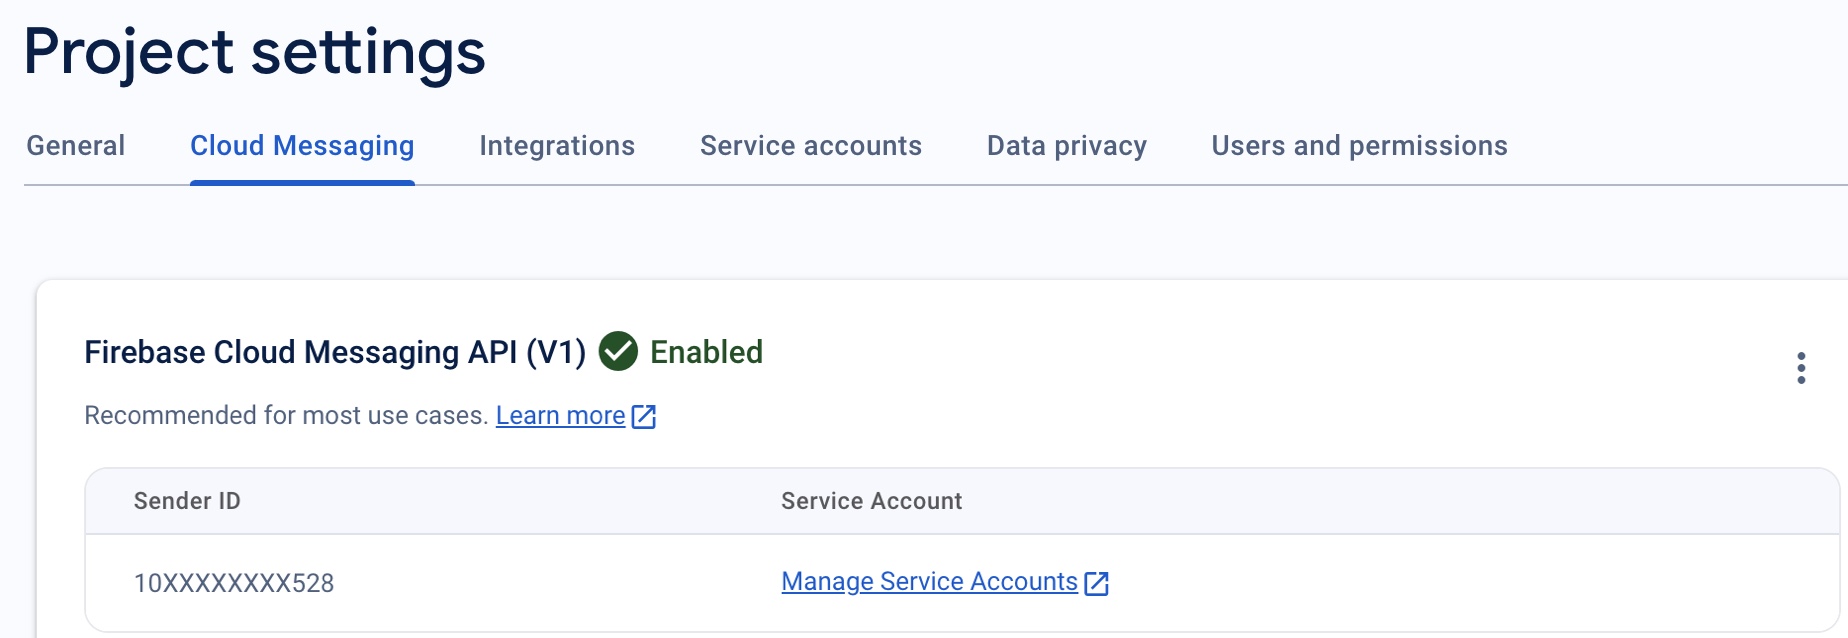
- Ensure Firebase Cloud Messaging API (V1) is enabled: The Firebase Cloud Messaging API (V1) is enabled by default for all the newly created projects. Hence, you can skip the step. However, for existing Firebase projects, you must have Cloud Messaging API (V1) enabled.
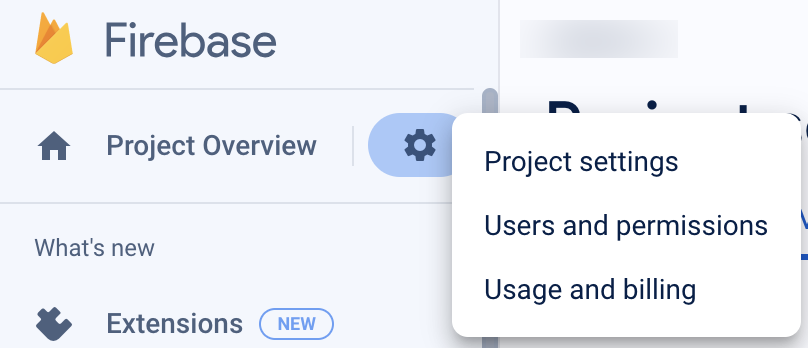
To check, click the Settings icon next to "Project Overview" in the top left of the left-hand menu and select Project settings. Select the "Cloud Messaging" tab.
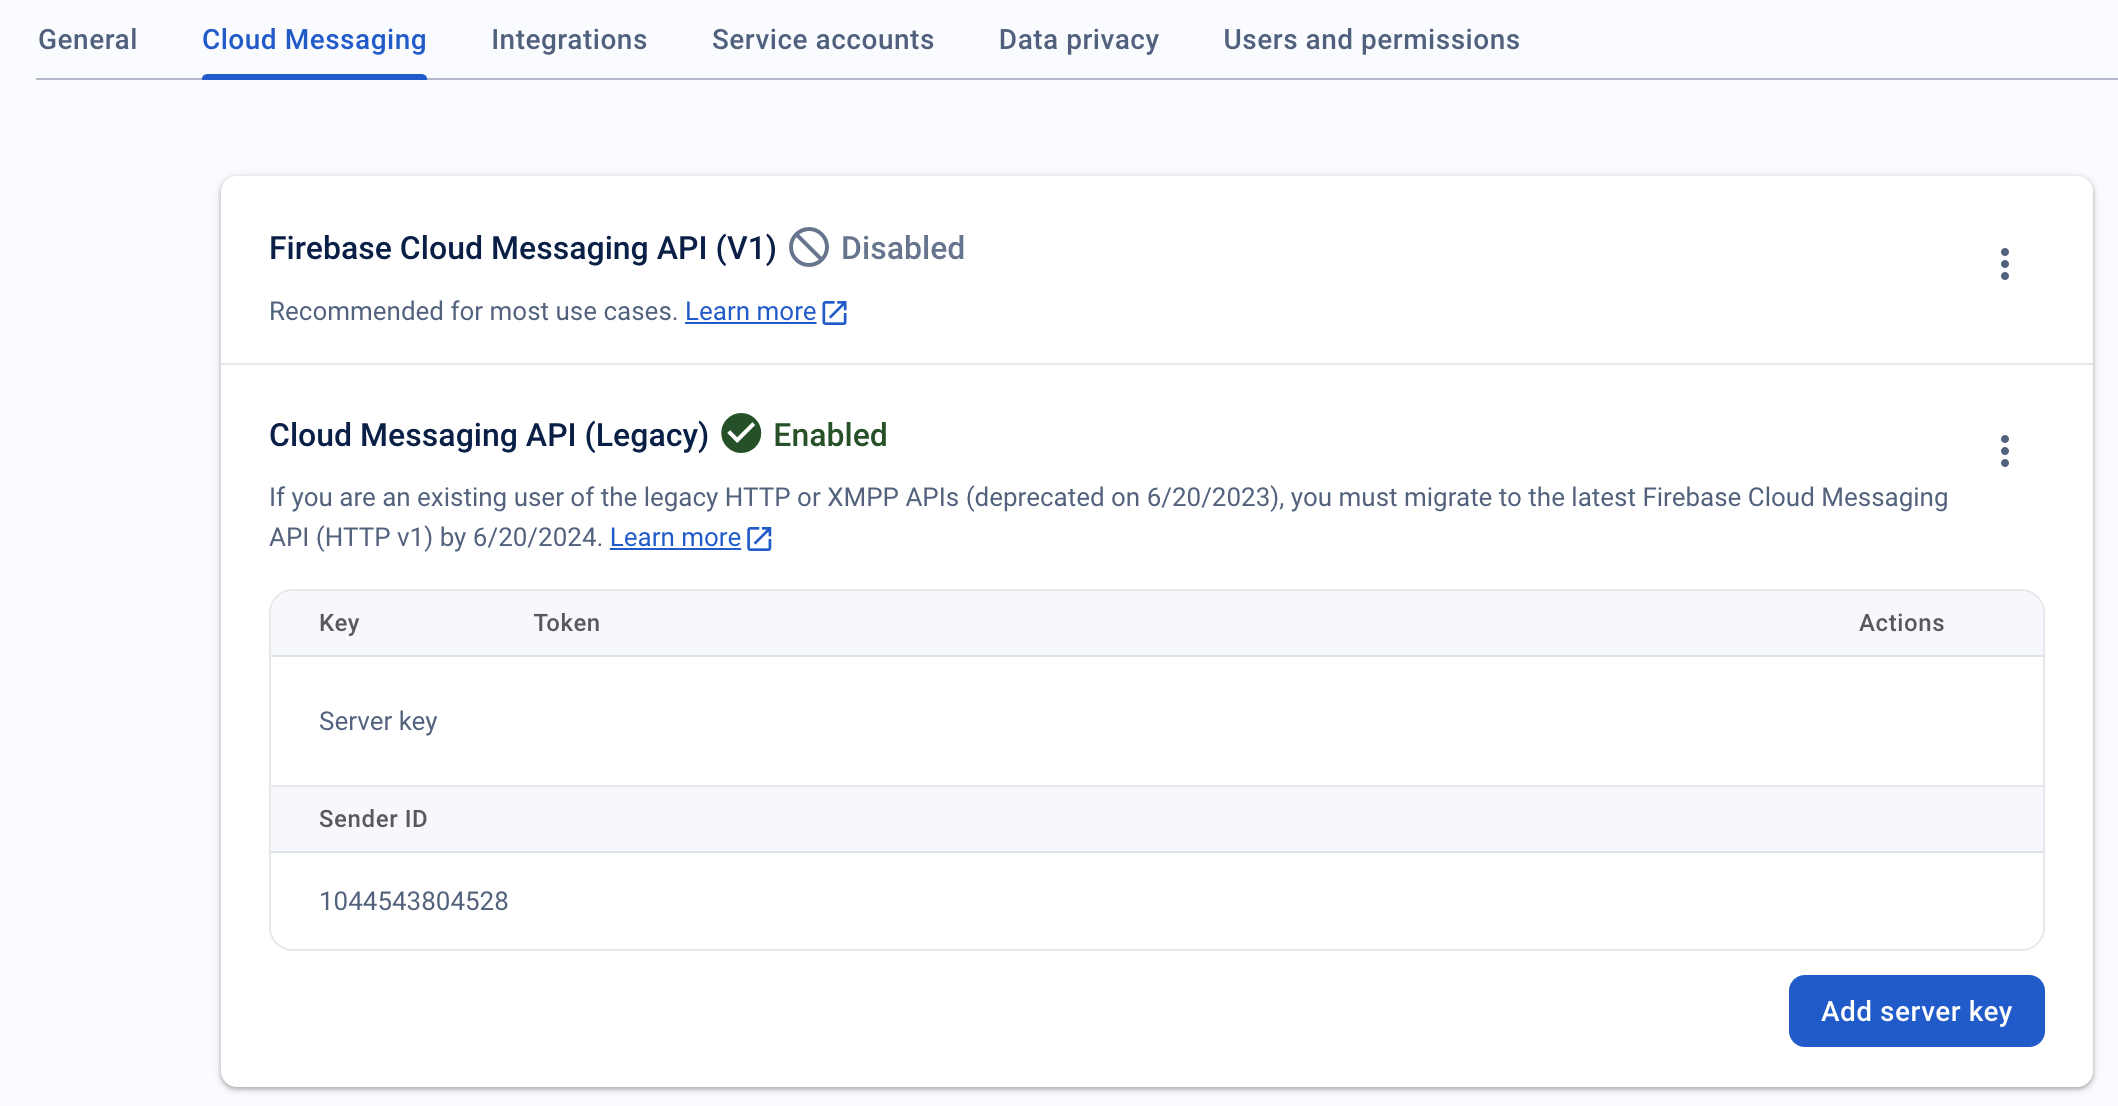
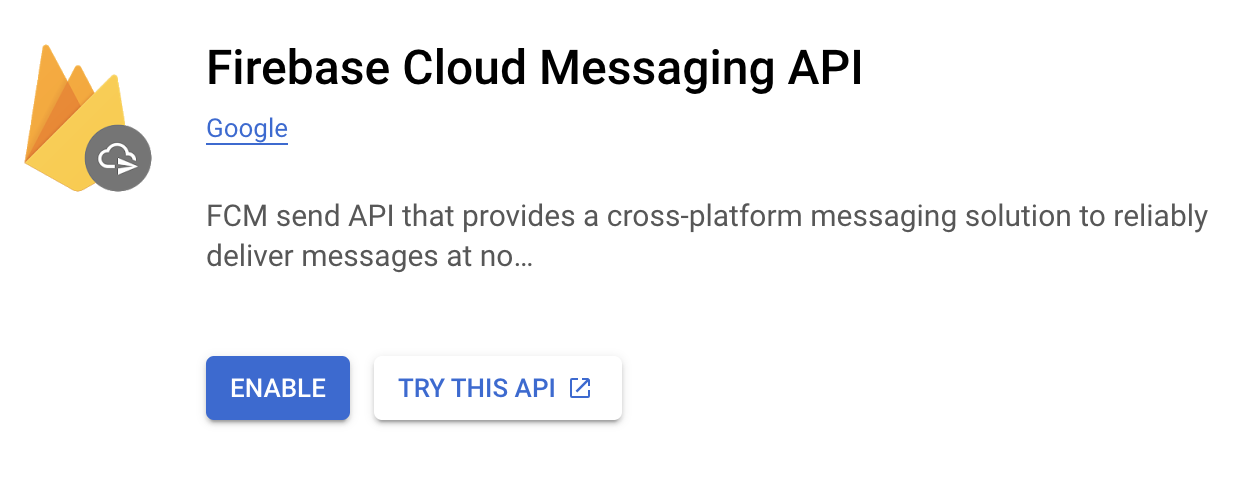
If it is disabled, click the More icon (three dots) and click Enable on the Product Details page. It may take a few minutes for the process to complete.
-
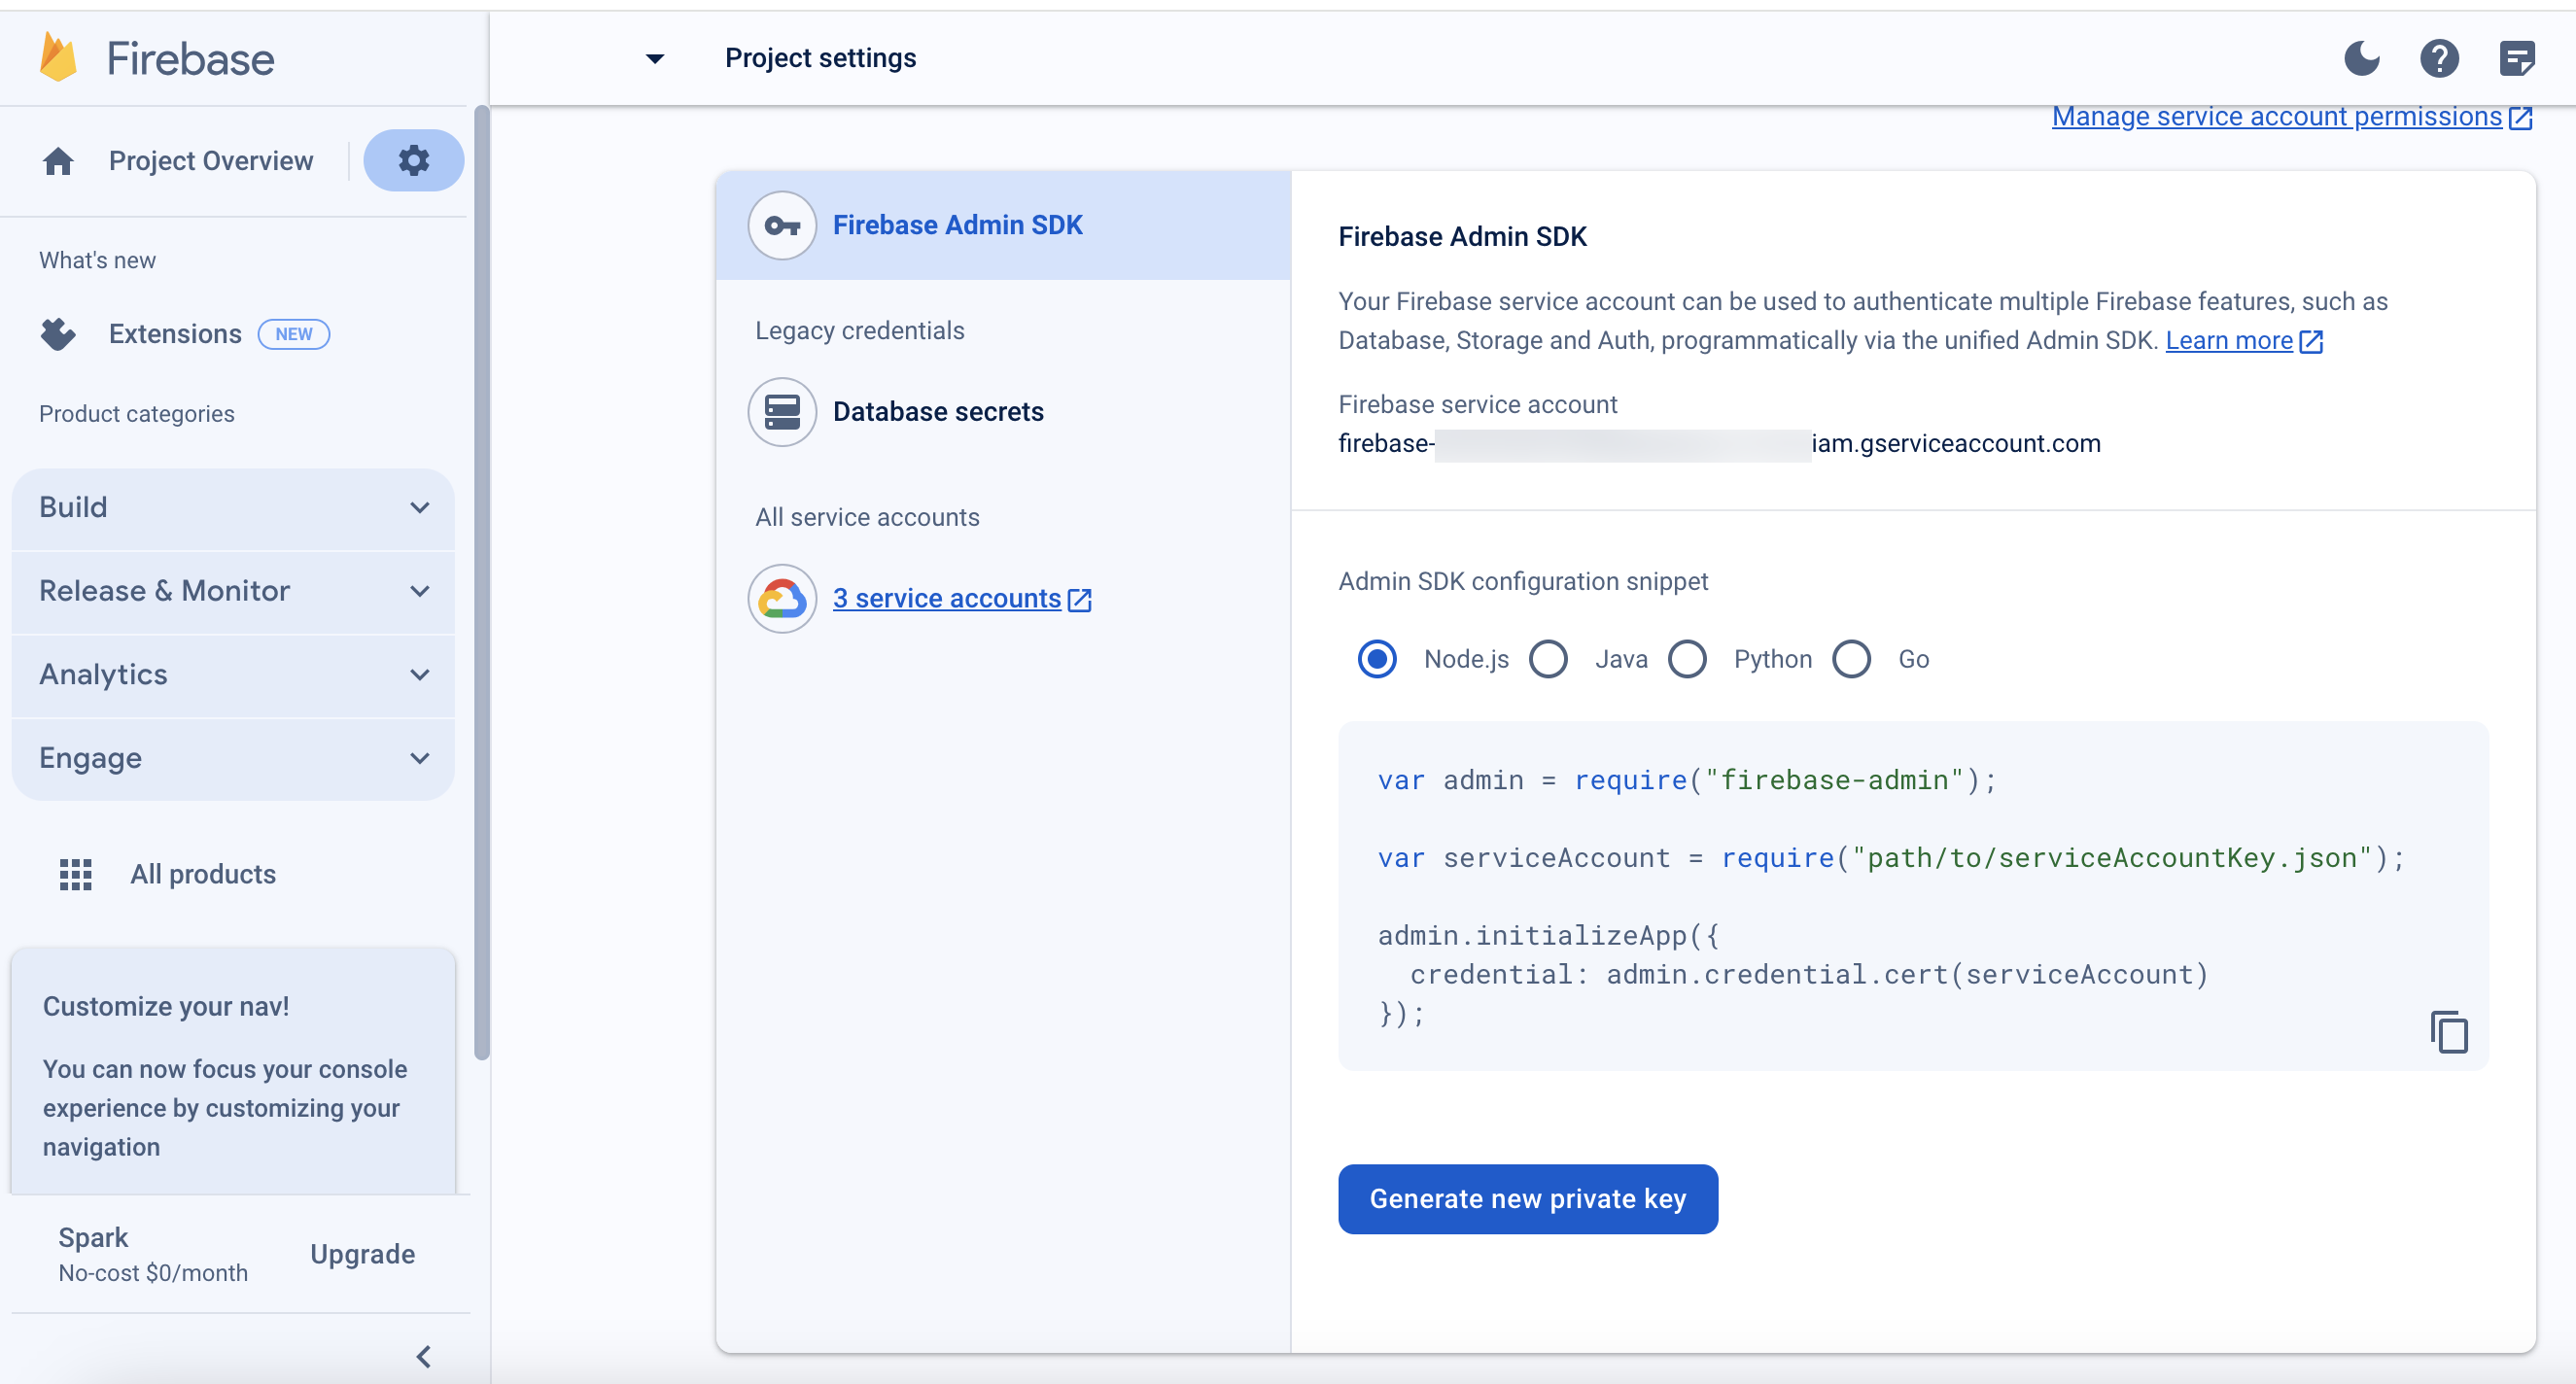
Click the Settings icon next to "Project Overview" in the top left of the left-hand menu and select Project settings.
-
Click Service accounts tab.

-
Click Generate new private key, under the Admin SDK configuration snippet.
A warning message appears as shown below.
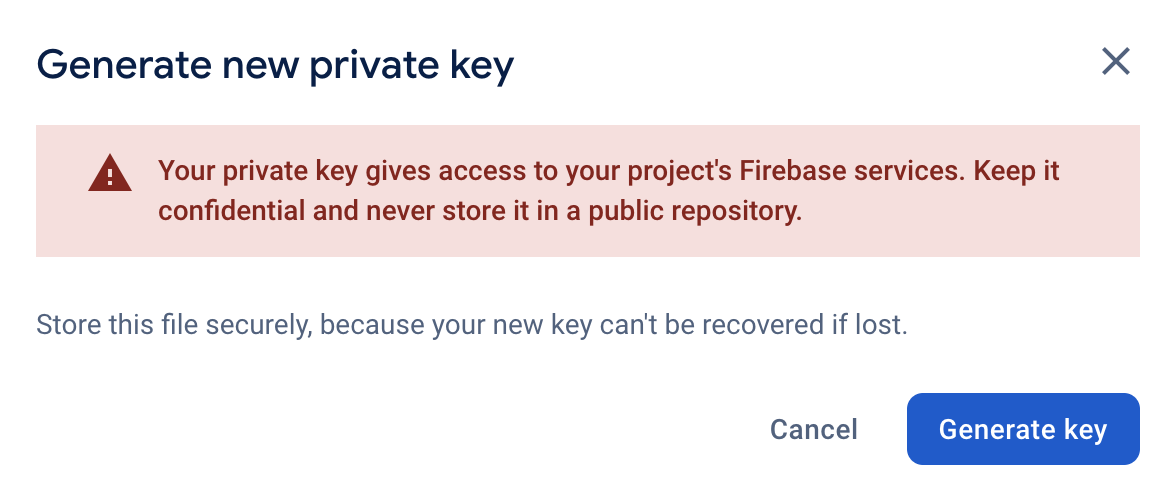
- Click Generate Key. A JSON file will be downloaded.
Note: Do not edit the downloaded JSON file. This is needed within the next section.
2. Configure Push-Notification channel
2a. Configure Push-Notification channel for Android
For existing customers, the default authentication type is the legacy FCM API, which uses FCM Server Key based authentication. To migrate to the FCM HTTP v1 API, please follow the steps below to complete the migration:
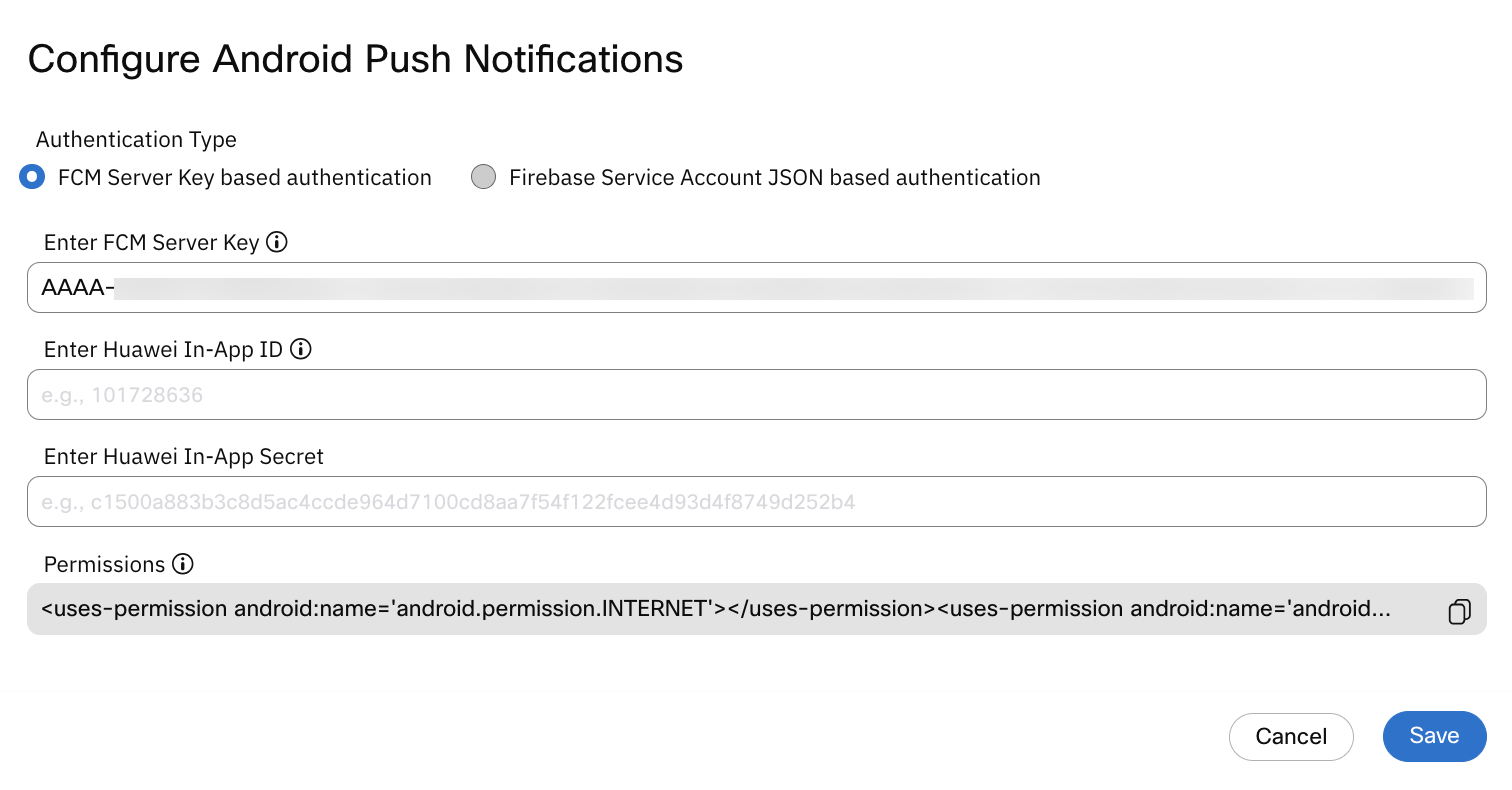
To migrate to the FCM HTTP v1 API, follow these steps:
- Select Firebase Service Account JSON based authentication as the Authentication Type.
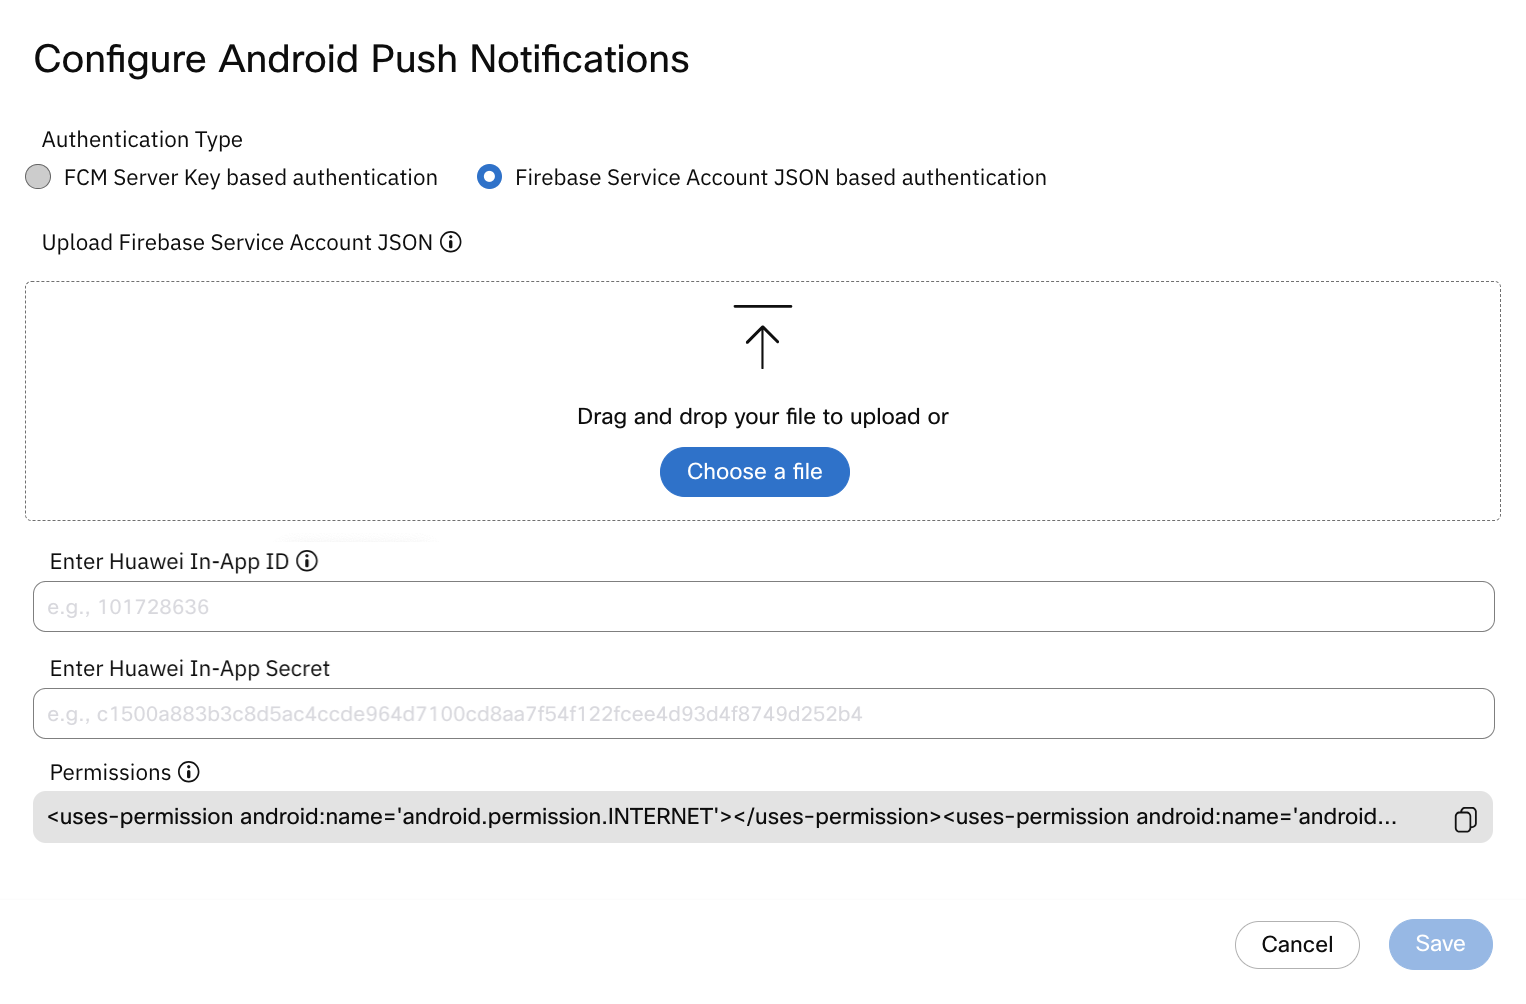
- Click Choose file and upload the JSON file downloaded from the Firebase Project.
- Click Save to complete the migration.
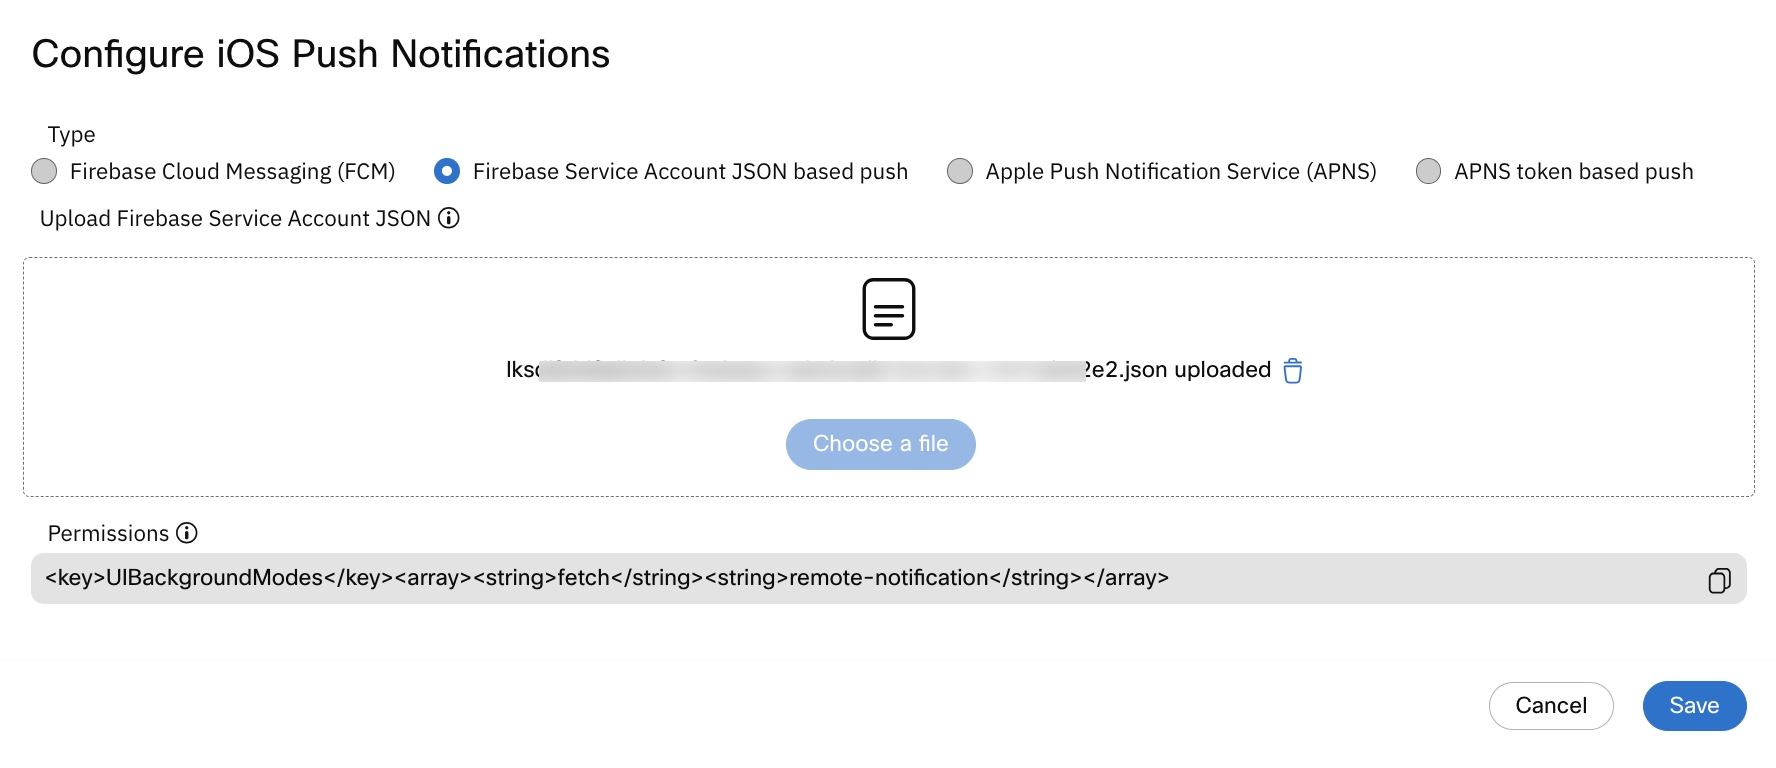
2b. Configure Push-Notification channel for iOS
In the pop-up that appears, you will see the following options. By default, for existing users FCM selected. To migrate to the FCM HTTP v1 API, please follow the steps below to complete the migration:

To migrate to the FCM HTTP v1 API, follow these steps:
- Select Firebase Service Account JSON based authentication as the Authentication Type.
- Click Choose file and upload the JSON file downloaded from the Firebase Project.
- Click Save to complete the migration.
2c. Configure Push-Notification channel for Web
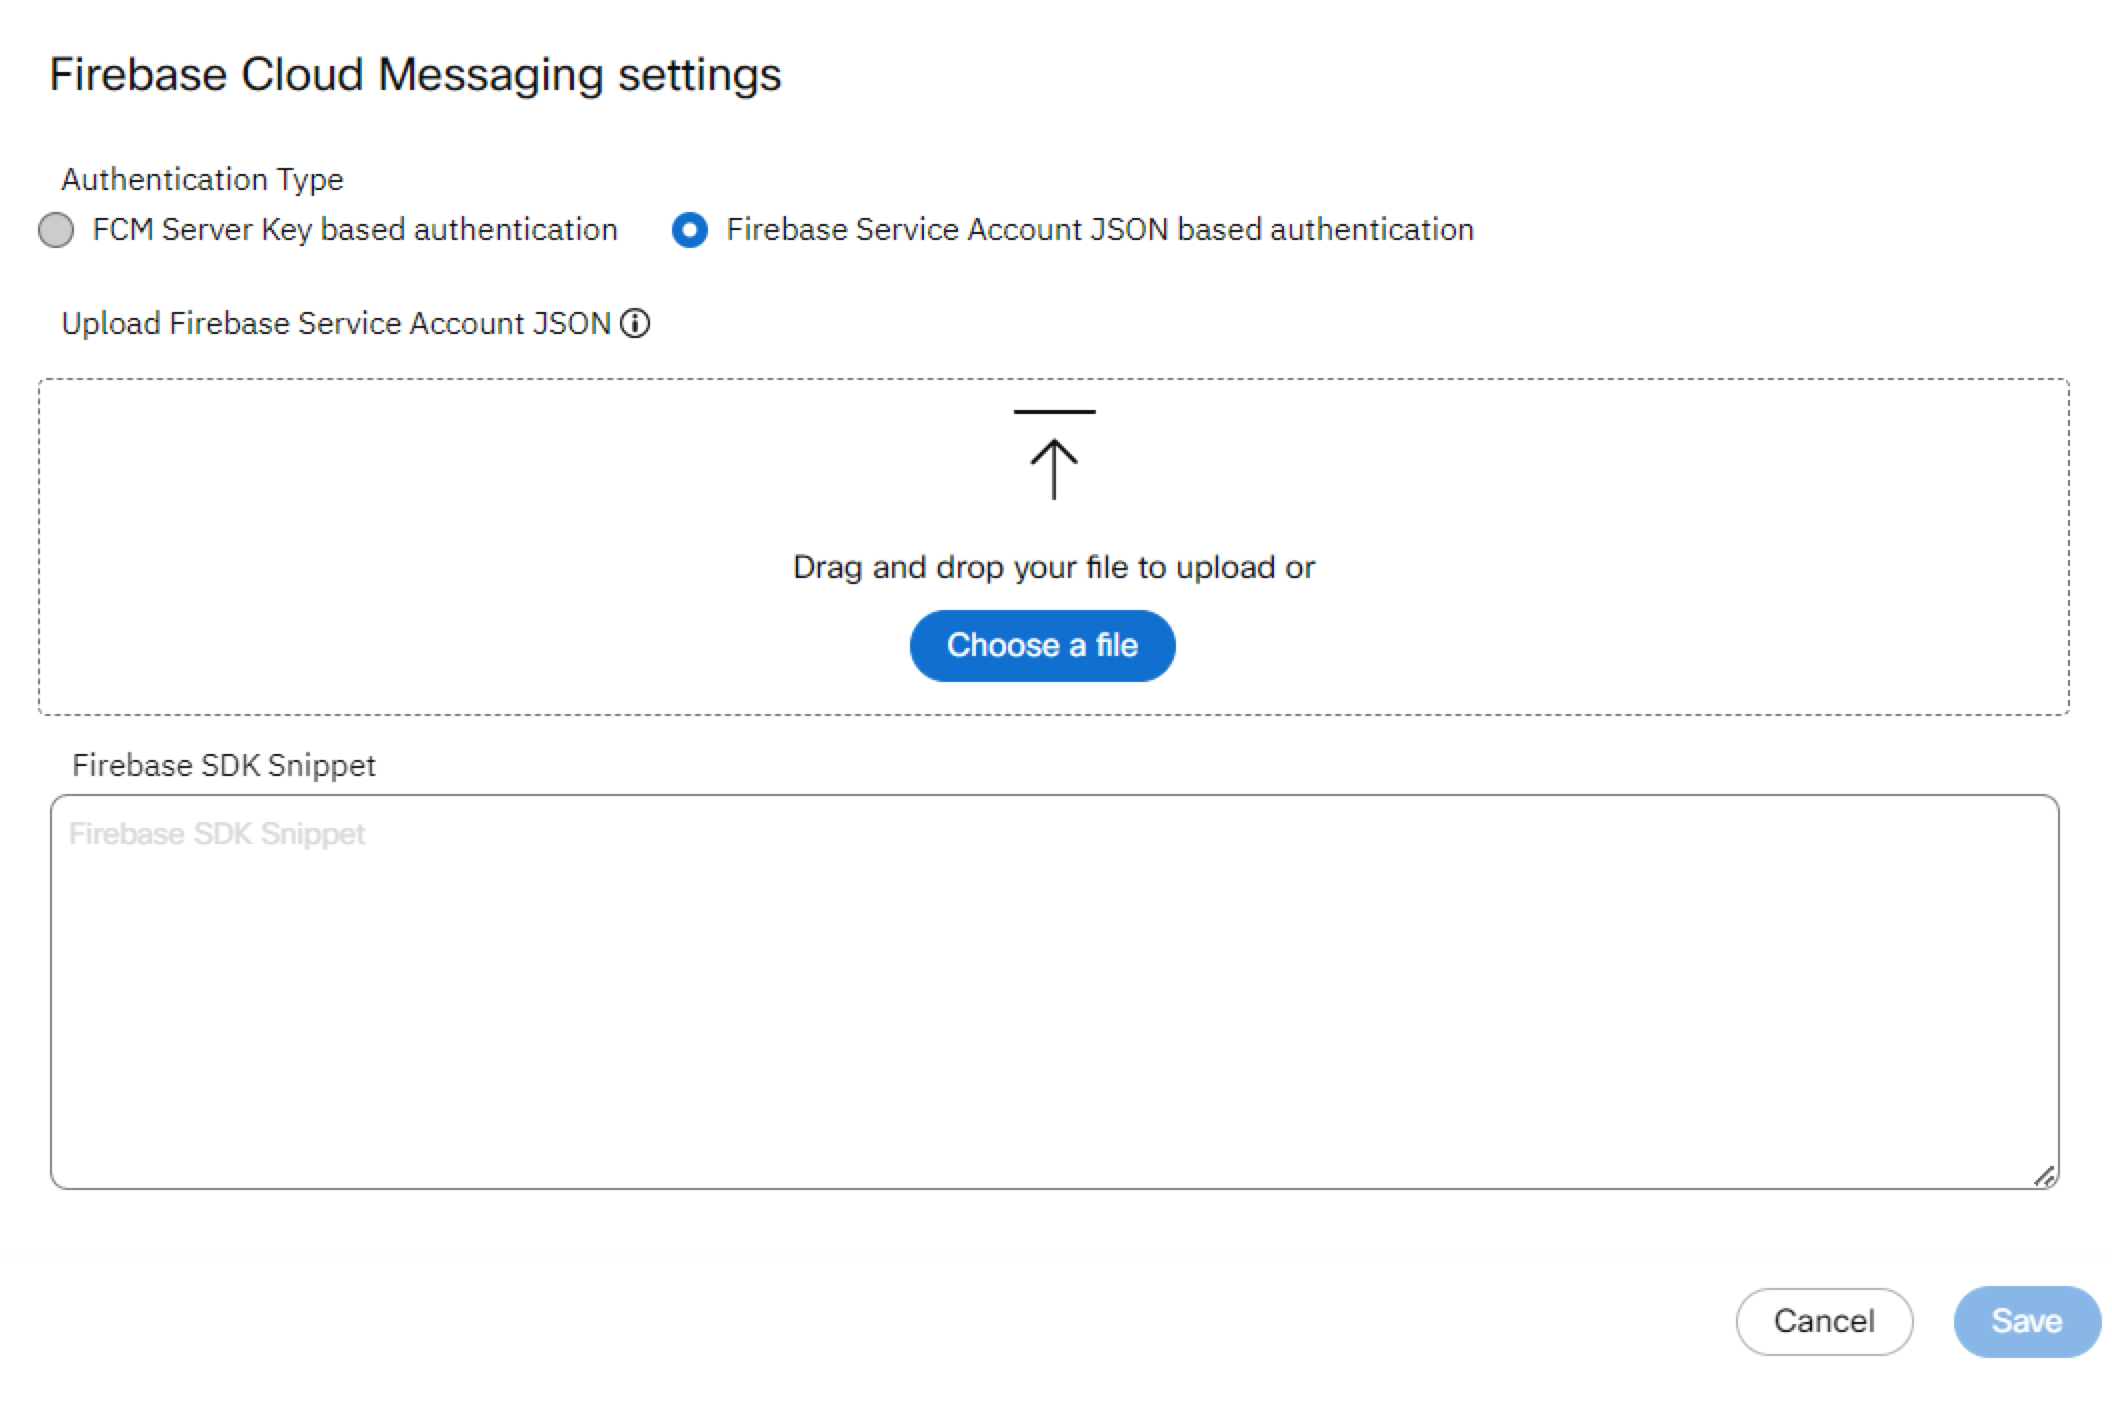
For existing customers, the default authentication type is the legacy FCM API, which uses FCM Server Key based authentication. To migrate to the FCM HTTP v1 API, please follow the steps below to complete the migration:
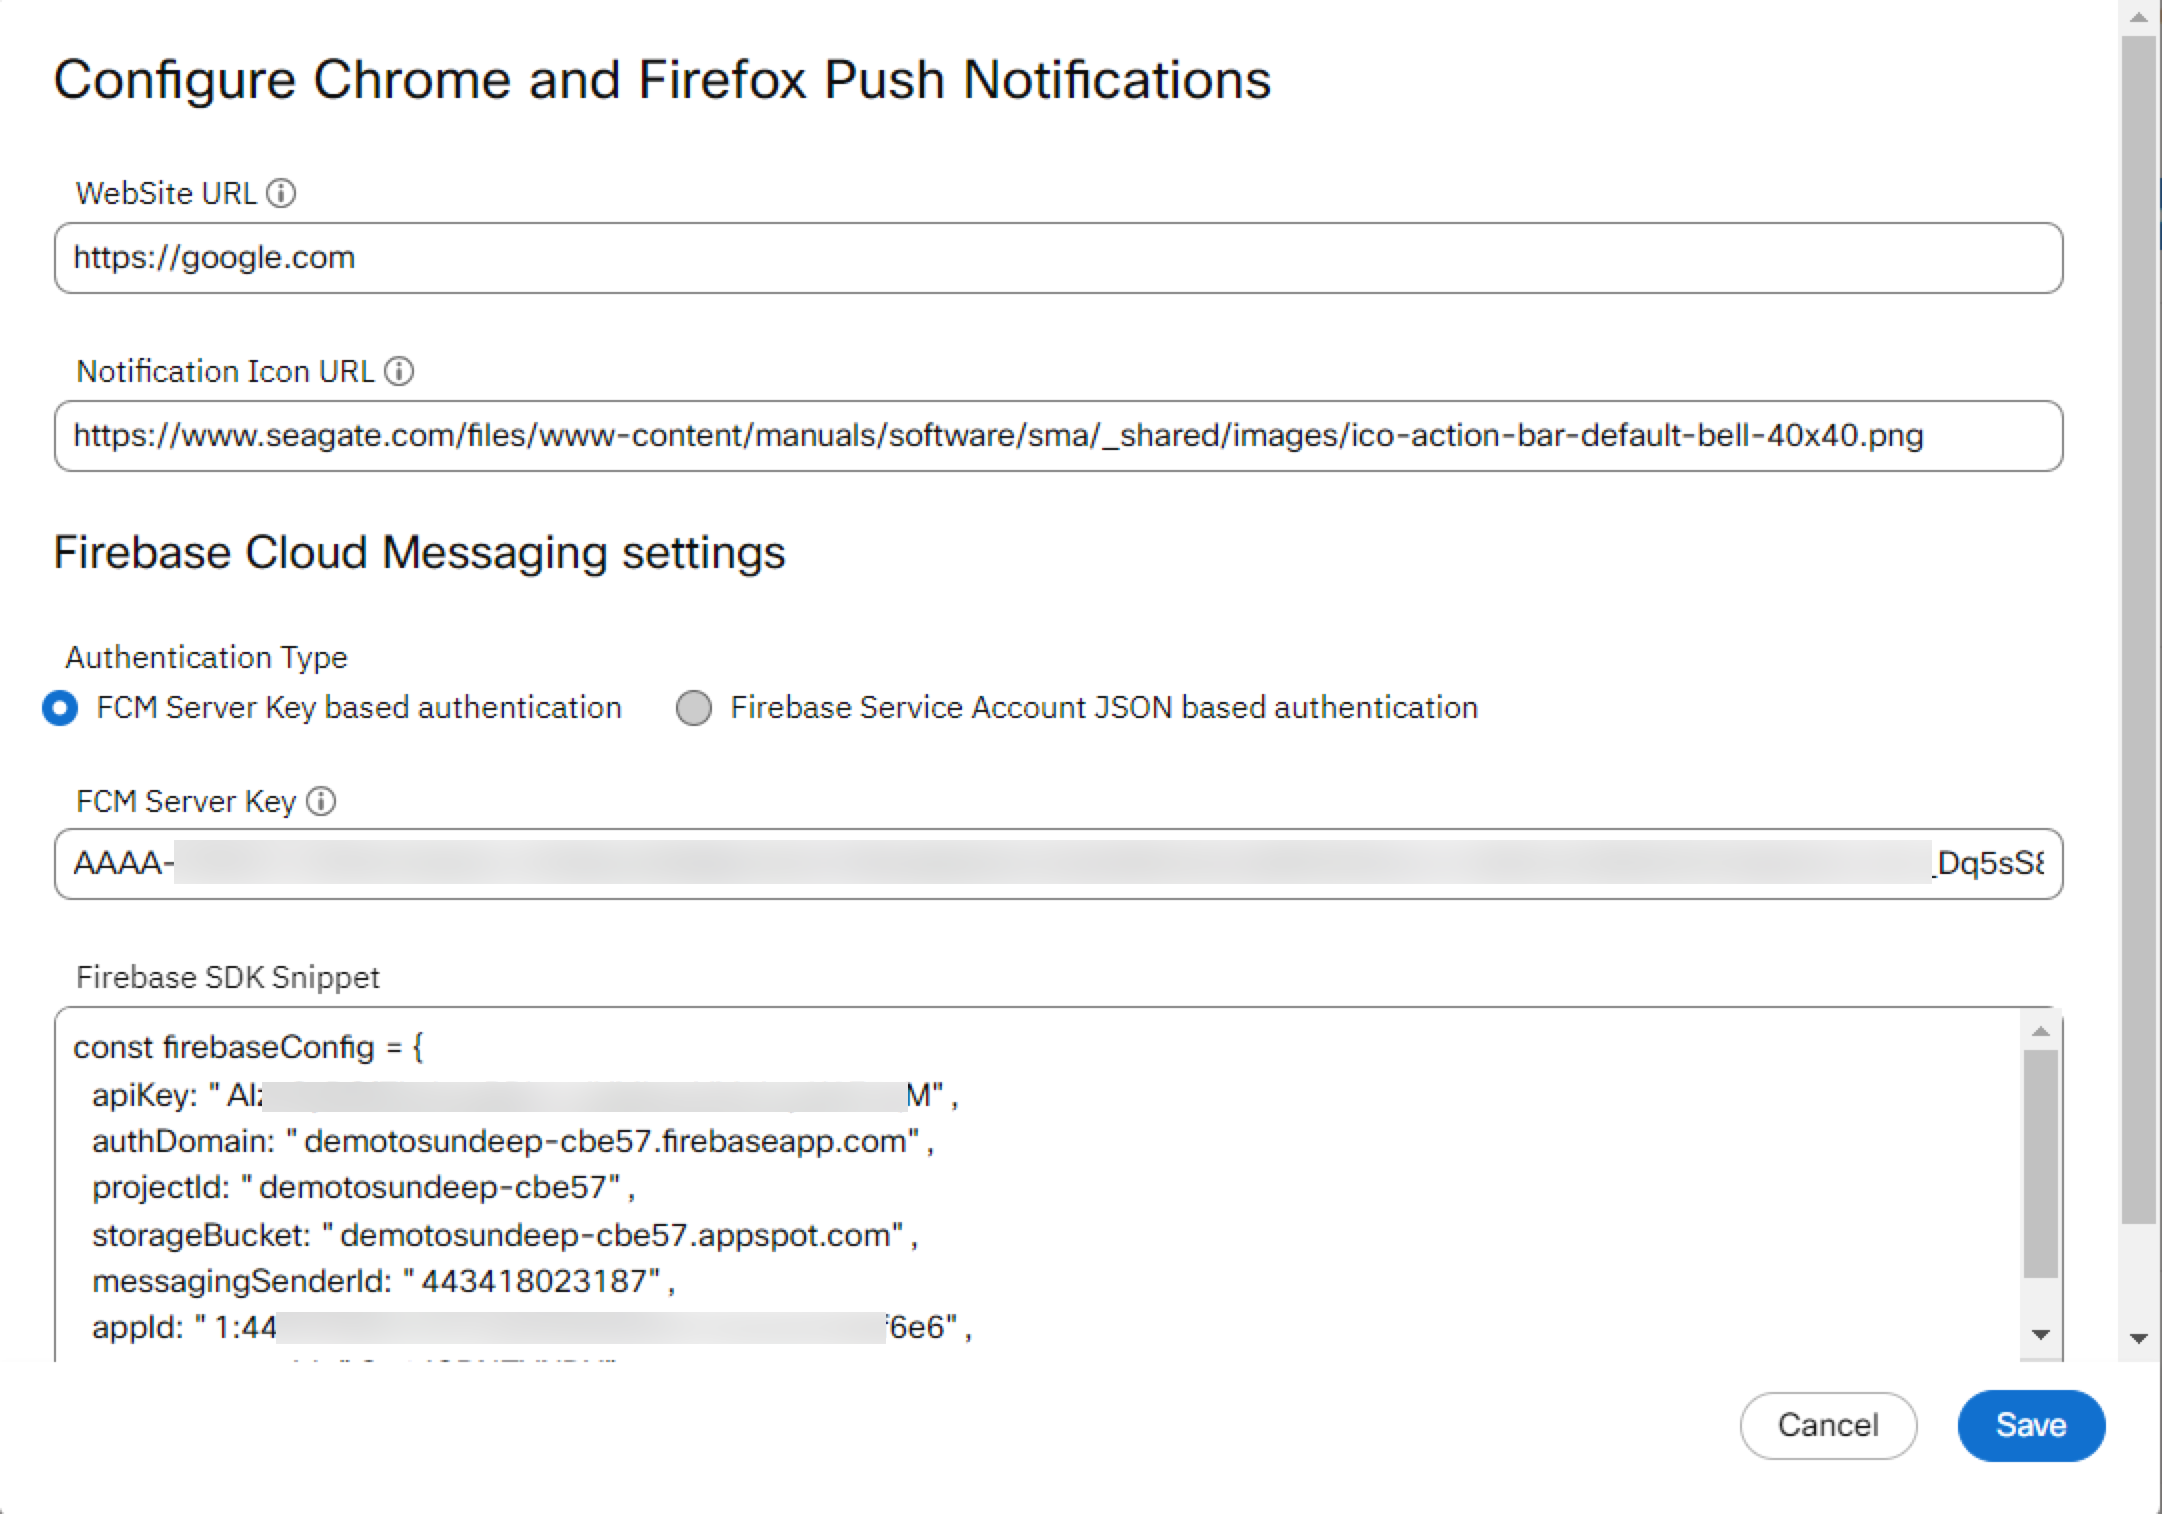
To migrate to the FCM HTTP v1 API, follow these steps:
- Select Firebase Service Account JSON based authentication as the Authentication Type.
- Click Choose file and upload the JSON file downloaded from the Firebase Project.
- Click Save to complete the migration.
Key Points to Note
- Timeline: Ensure you make the changes well before the June 2024 deadline to avoid any last-minute issues.
- Webex Connect Version: The new HTTP v1 API support is available starting from Webex Connect version 6.5.0.
- Support: In case you encounter any difficulties or have questions, our support team is ready to assist you.
Updated 10 months ago
