
Set-up a new Mobile / Web App Asset
Understand how to set up a new Mobile or Web App asset.
To leverage our SDKs within your application, you must first create an app asset within the Webex Connect platform. The asset configuration determines which SDK features are enabled and available for you to use.
When an app asset is configured the platform will assign an App ID and Client Key. These credentials must be provided to the SDK by your app and form part of the authentication process with the Webex Connect platform.
Important!
For enhanced security you should consider implementing JWT authentication.
In order to send Push Notifications or Live Chat / In-App messages to your app, the asset must be mapped to a service.
Note
Your account administrator should have been provided a URL to the Webex Connect Portal, this URL is unique to your account. If you do not have your account URL, please contact your account administrator.
Create a Mobile App Asset in Webex Connect
- Log in to your Webex Connect Portal account using your unique account URL.
- Navigate to Assets > Apps. The Apps page is displayed.
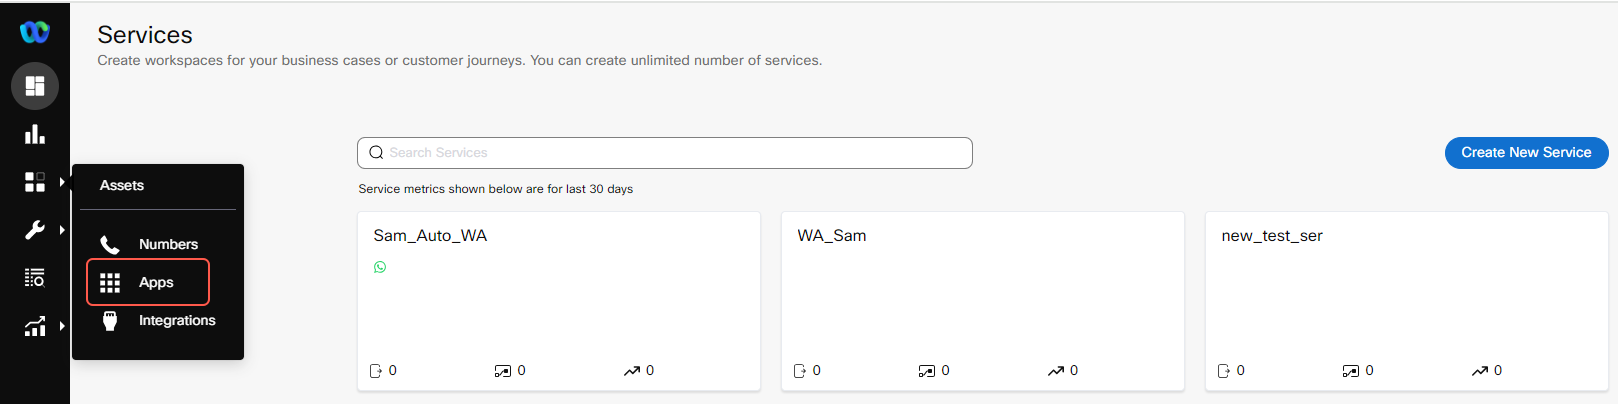
Screenshot displaying the Assets Menu.
- Click Configure New App > Mobile / Web.
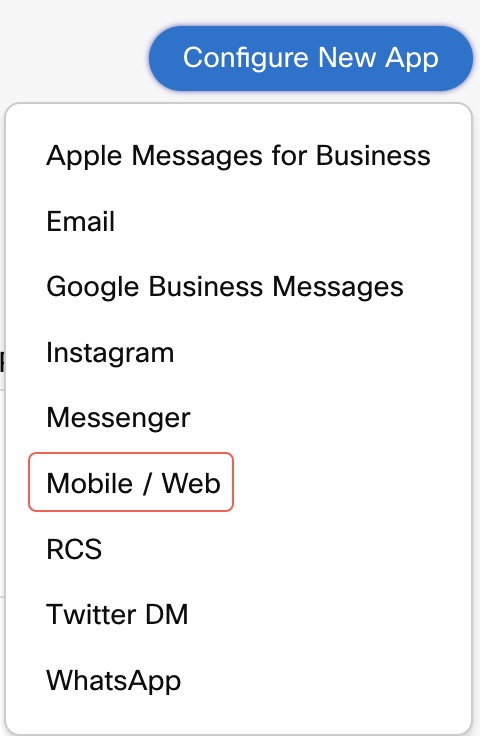
Screenshot of selecting the Mobile / Web App.
-
In the app configuration screen, enter a name for your app and make a note of CLIENT KEY provided within the Access Credentials section.
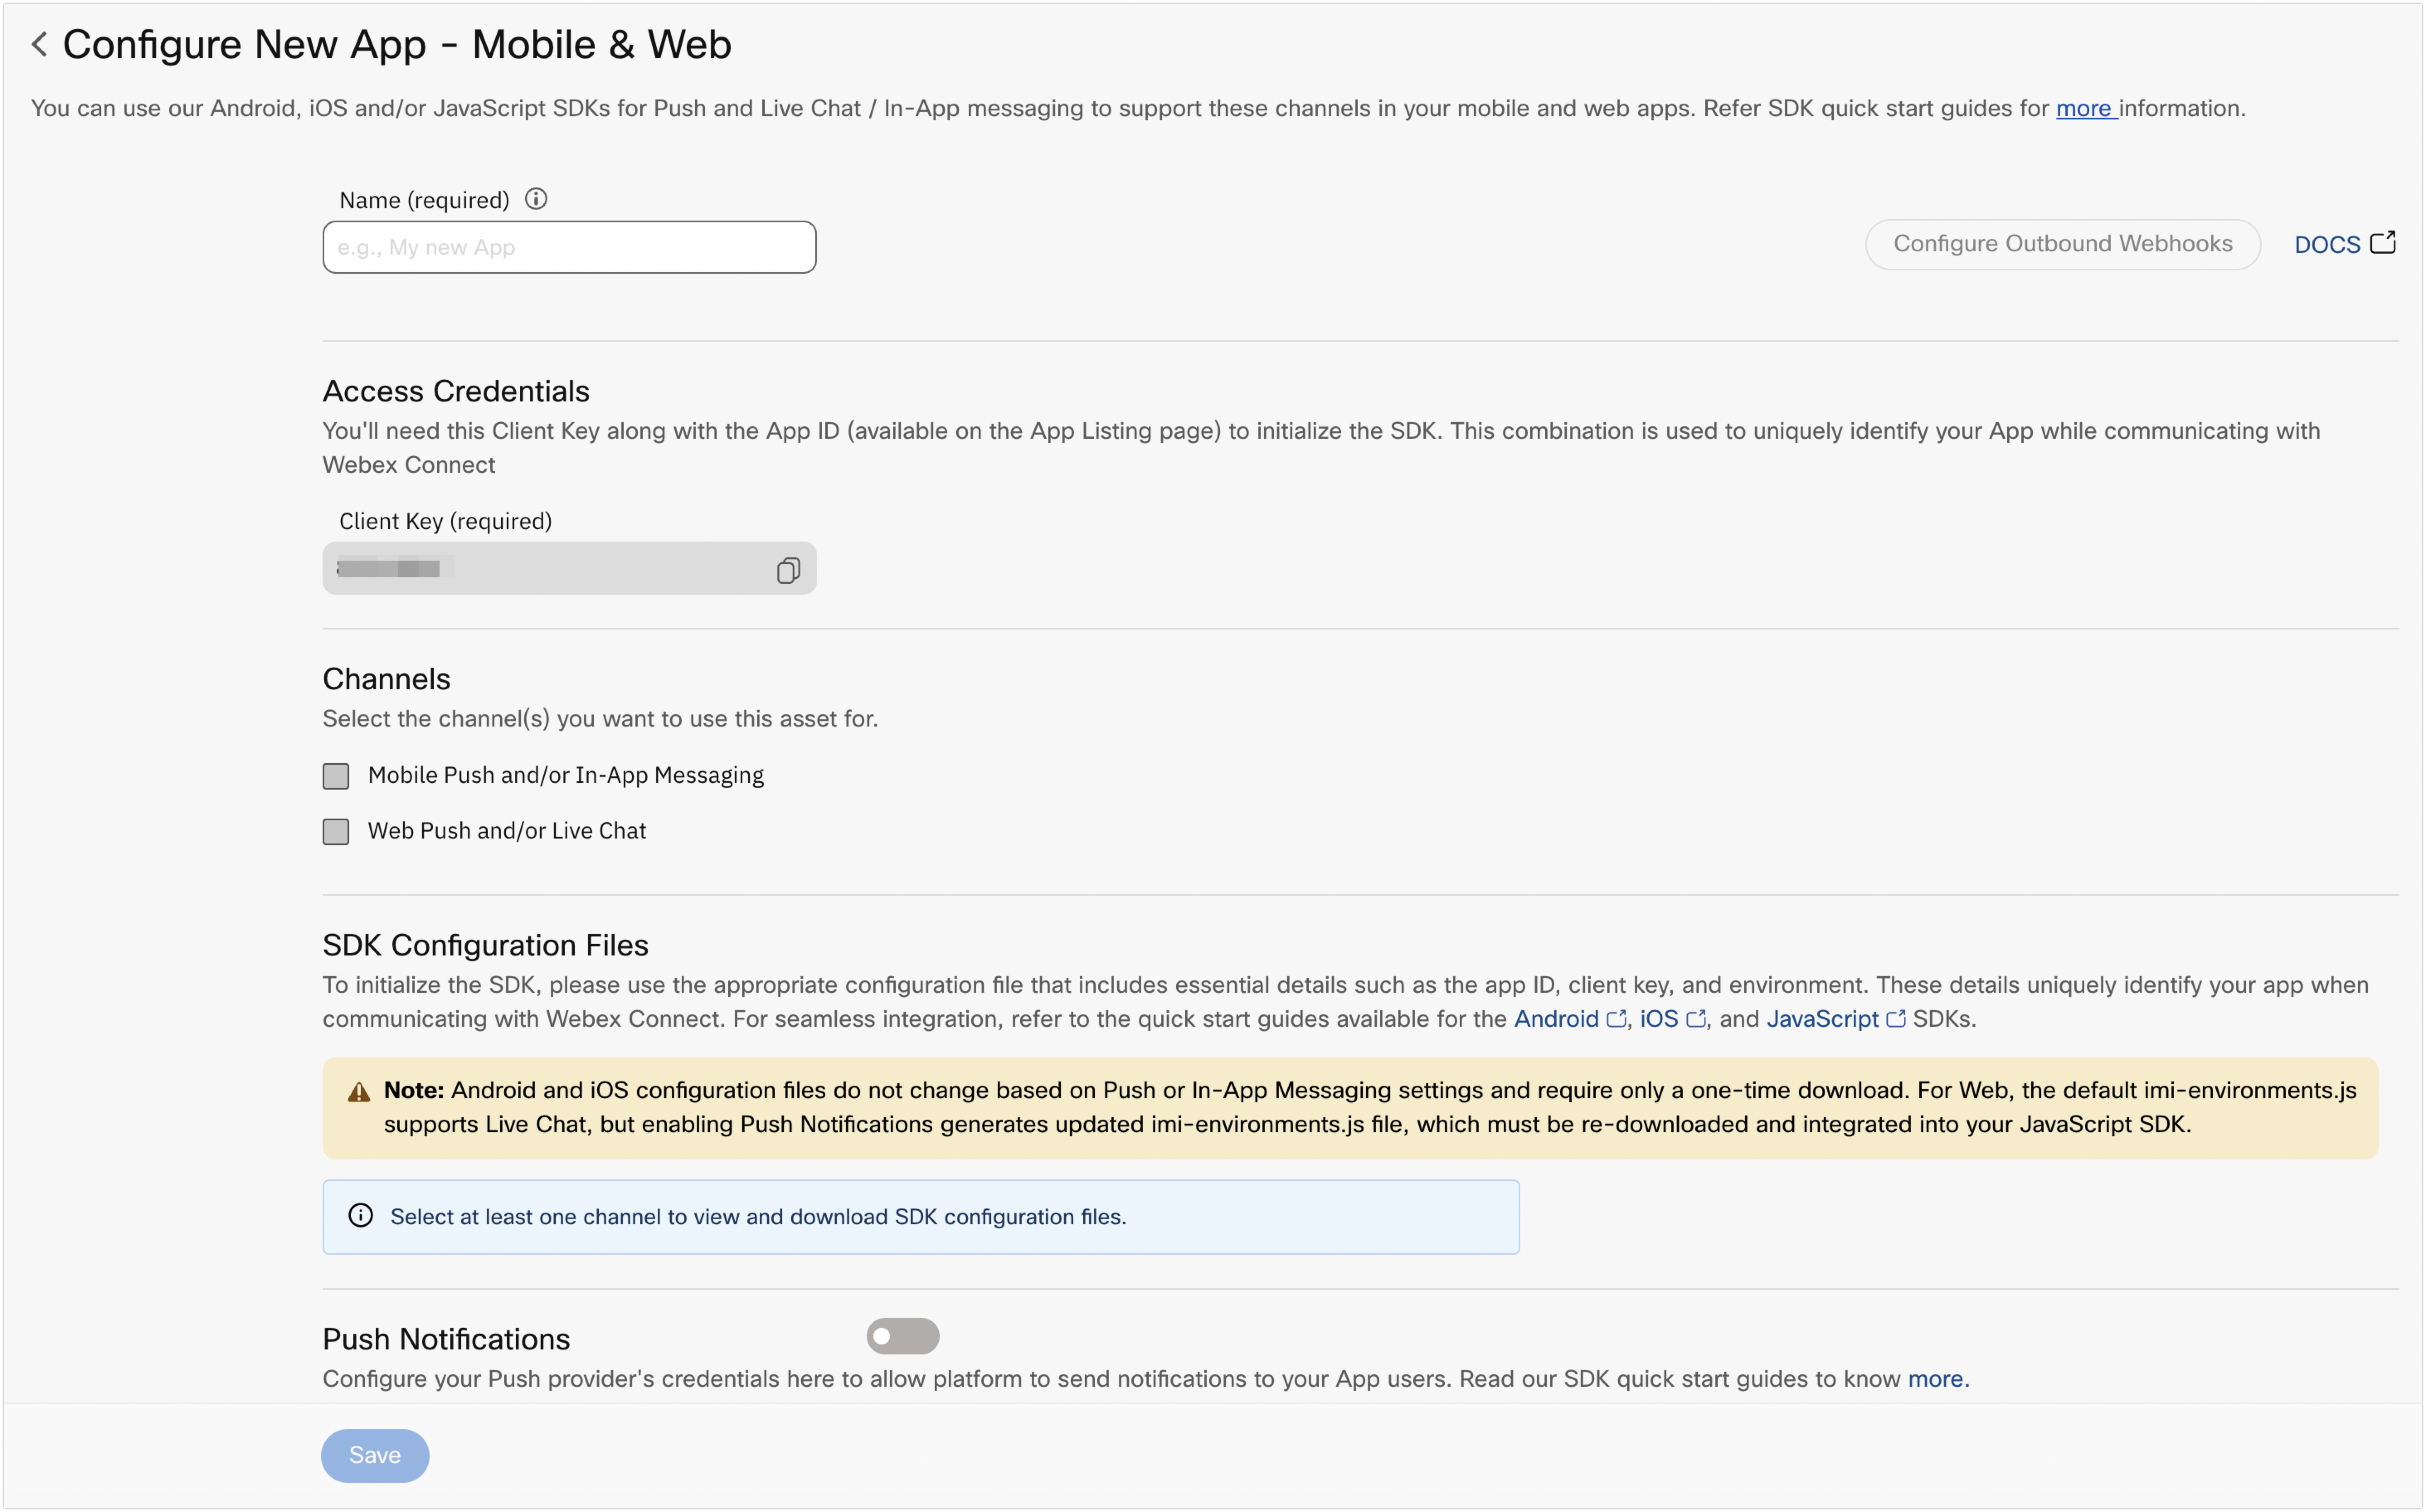
Screenshot of Configuring New Mobile & Web App Page
-
In Channels, select one of the following:
- Mobile Push and/or In-App Messaging
- Web Push and/or Live Chat
-
Select one of the following:
- Push Notifications
- Live Chat / In-App Messaging
-
To initialize the SDK, please use the appropriate configuration file that includes essential details such as the app ID, client key, and environment. Download the corresponding configuration files for Android, iOS and Web SDKs from SDK Configures files section.
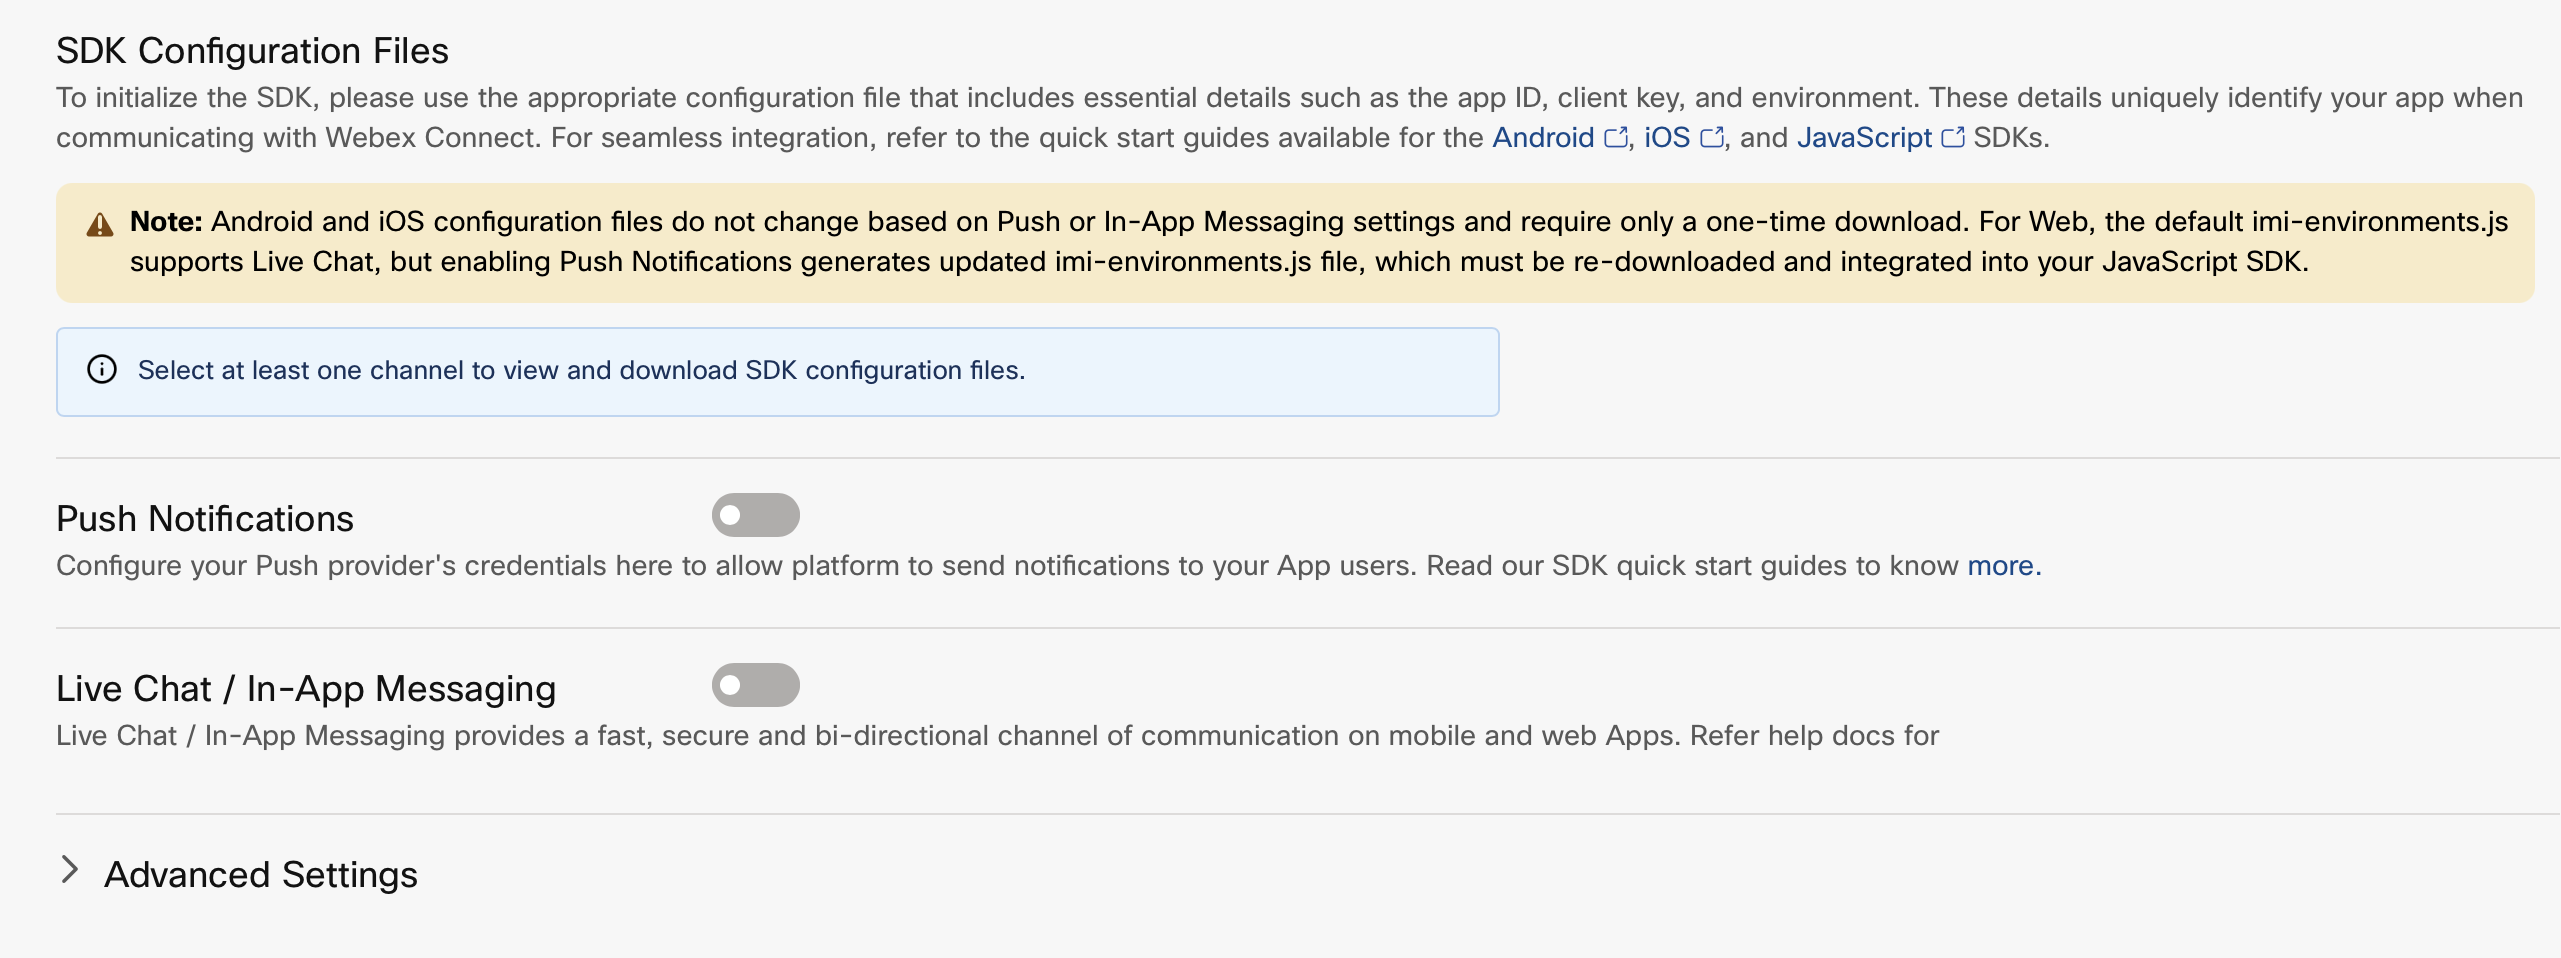
Screenshot of SDK Configuration Files
-
Configure Push Notifications Within the Push Notifications section, hover over the Platform Type and click Configure to configure OS-specific Push Notification settings.
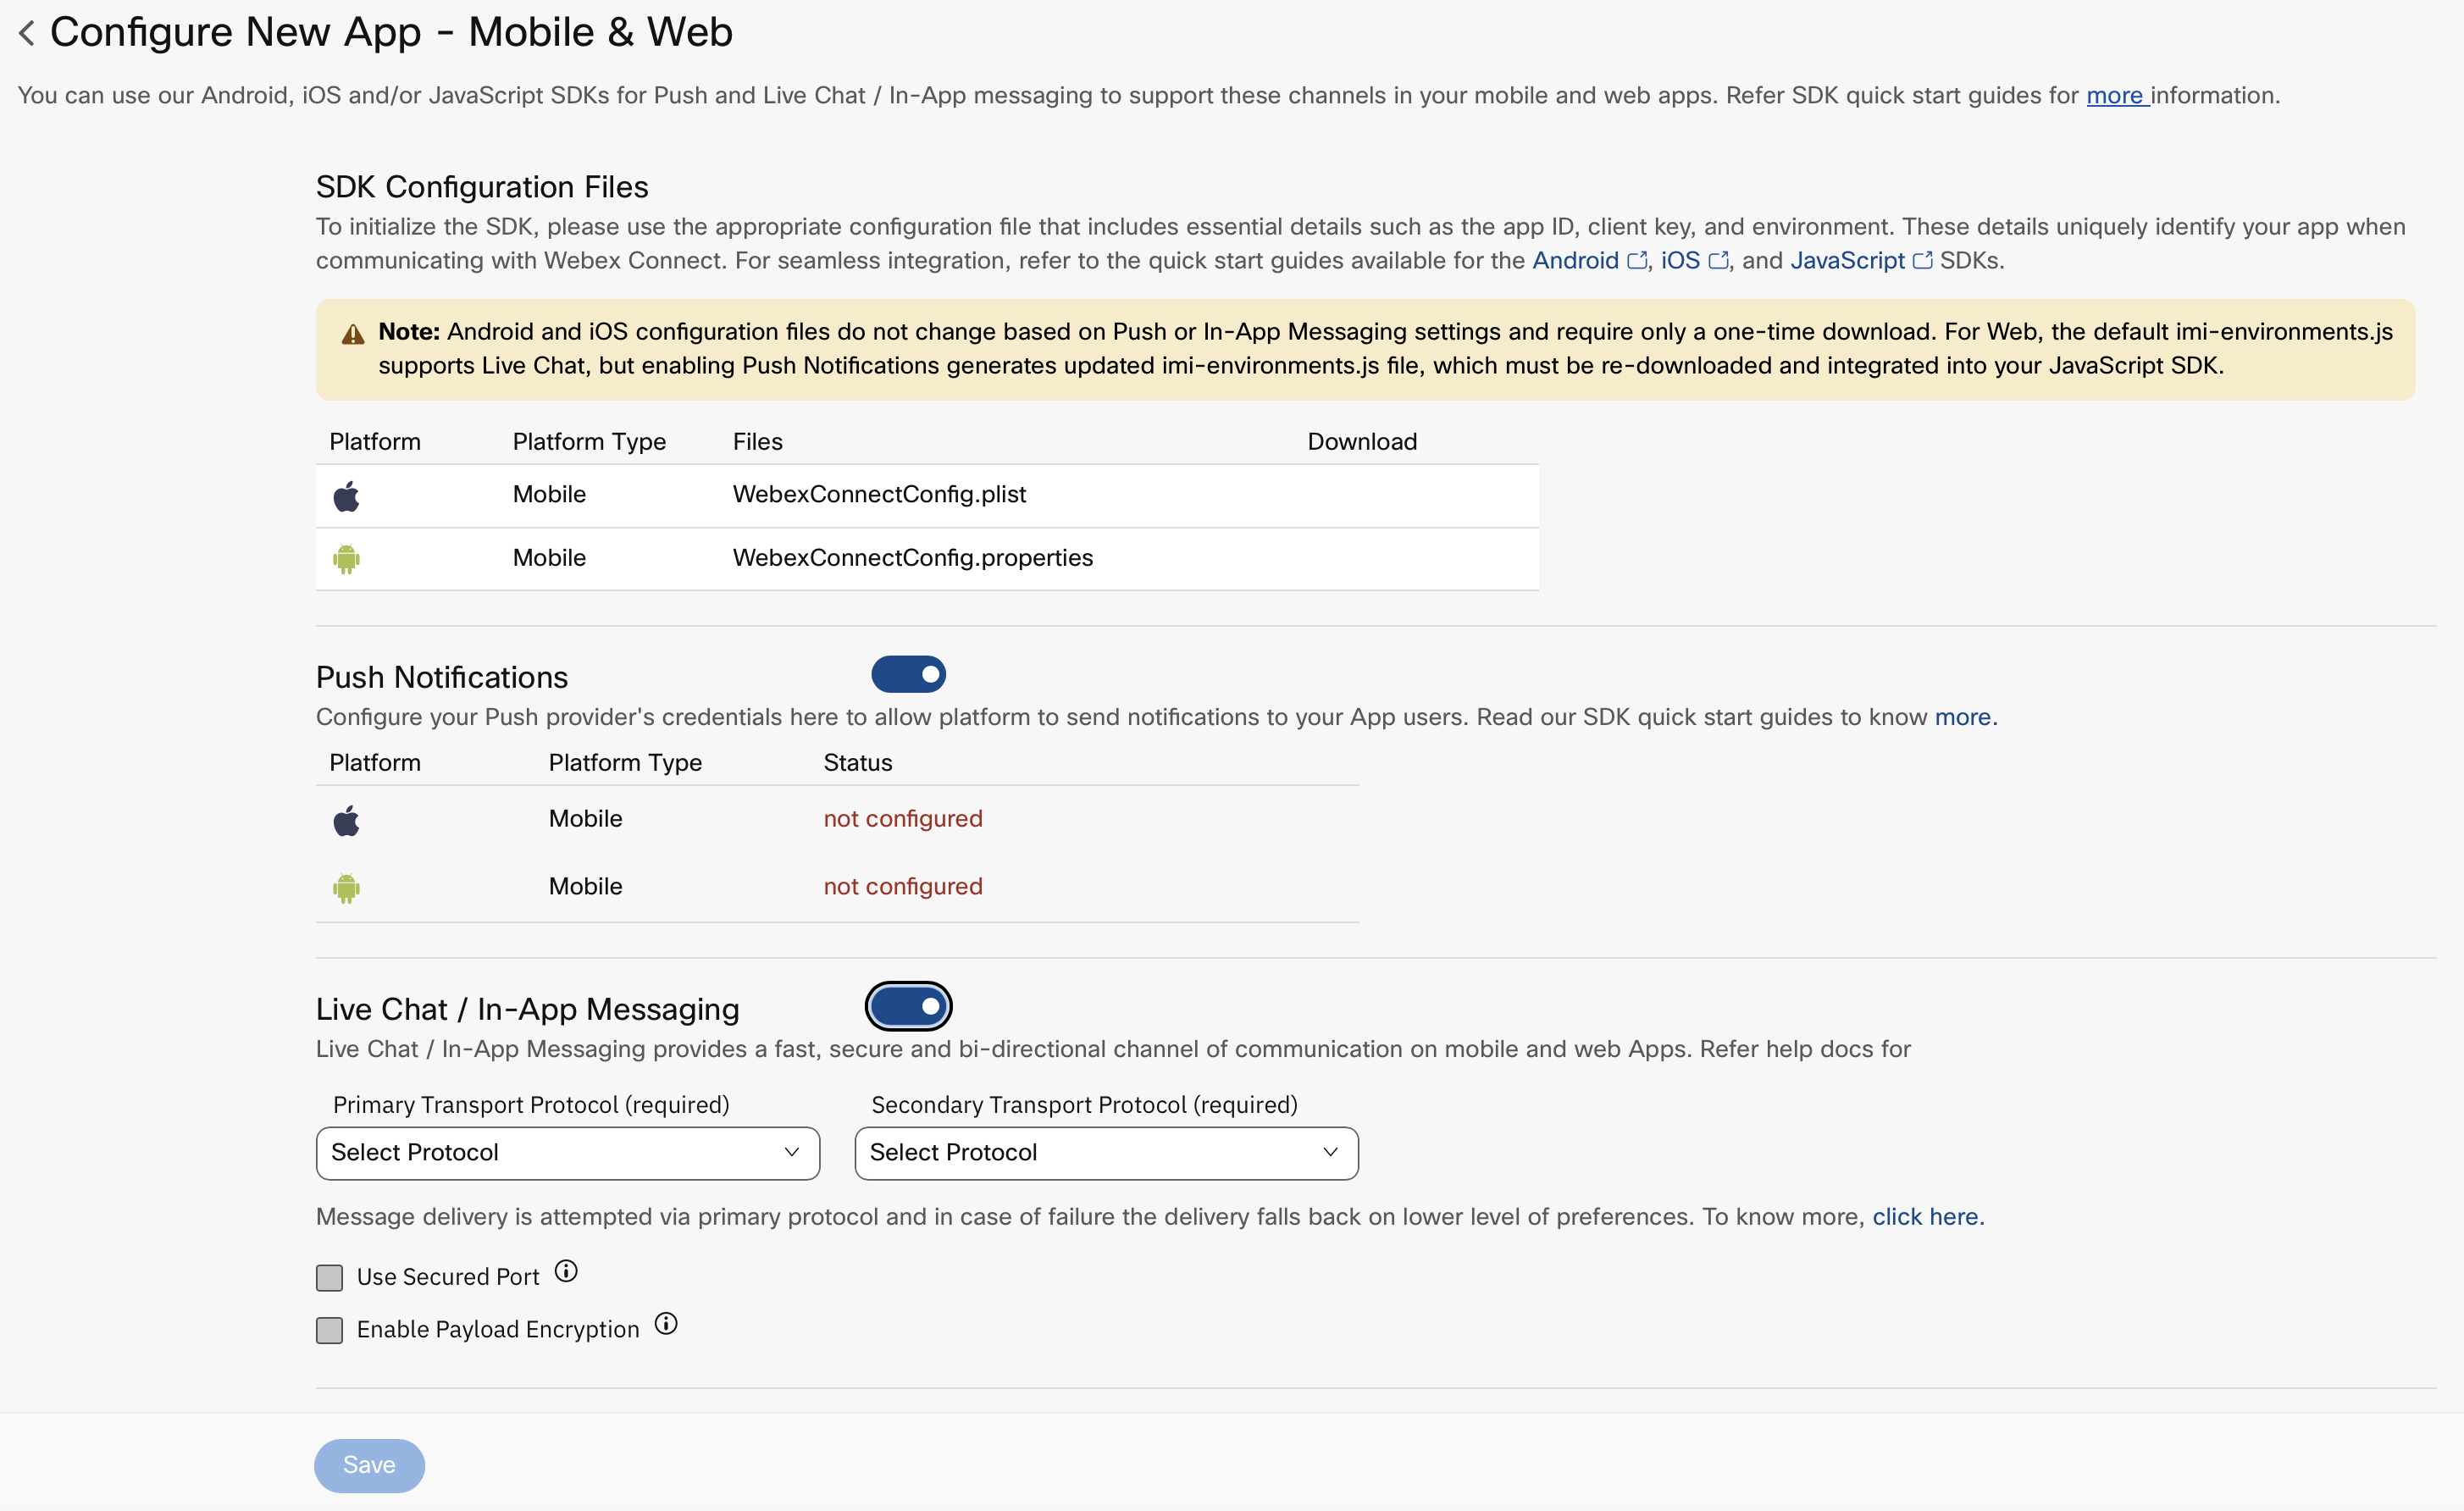
Screenshot of Push and Live Chat / In App Messaging Notifications Section.
Note
The information required to configure push notifications for each platform will vary as it is specific to each platform.
- Configure Live Chat / In-App Messaging
| No. | Live Chat / In-App Messaging Settings | Mandatory / Optional | Description |
|---|---|---|---|
| 1. | Transport protocols | Mandatory | Two transport protocols are available for establishing Live Chat / In-App Messaging connection with Webex Connect. They are Web Socket and MQTT. You can configure them as primary and secondary. In case the connection is not established on the primary protocol, it will fall back to secondary protocol. |
| 2. | Use Secured Port | Mandatory | Enable secured ports to establish Live Chat / In-App Messaging connection on the secured port for MQTT and WebSocket as an extra layer of security. |
| 3. | Enable Payload Encryption | Optional | Enable Live Chat / In-App Messaging payload encryption to encrypt the Live Chat / In-App Messaging payload in transit. |
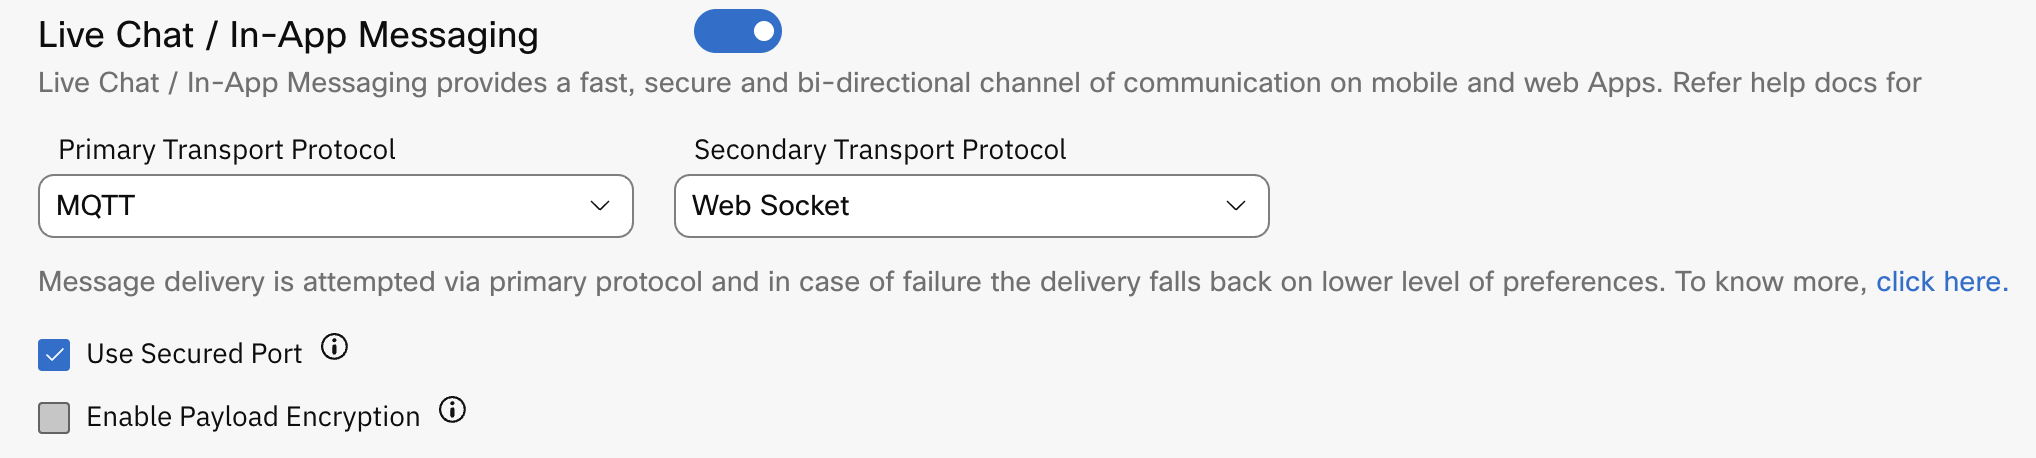
Screenshot of Live Chat / In-App Messaging Section.
- Advanced Settings You will see the following options under Advanced Settings. Select the required options as per your requirement.
Note
Modular SDK for both Android and iOS does not support device attribute monitoring capability.
| No. | Advanced Settings | Mandatory/Optional | Description |
|---|---|---|---|
| 1. | JWT Authorization - a. Symmetric b. Asymmetric | Optional | a. Symmetric: Configure JWT authorization to provide JWT secret key. b. Asymmetric: Upload the Public and Private keys. |
| 2. | Allow Multi User Registrations on Same Device | Optional | Multi-User Registration allows you to have multiple users registered from a single device at the same time. This will ensure that push notification sent to any of the registered user will be delivered on the device. However if the notification is sent to all the users registered on a device parallelly, you would see duplicate push notifications on that given device. |
| 3. | Single Device Per User | Optional | Restricts access to the application to one user per device. If you register on a new device, you will stop receiving push notifications on the older device. |
| 4. | Server Side Inbox | Optional | Allows the storage of data on server of Webex Connect. |
| 5. | Data Stream | Optional |
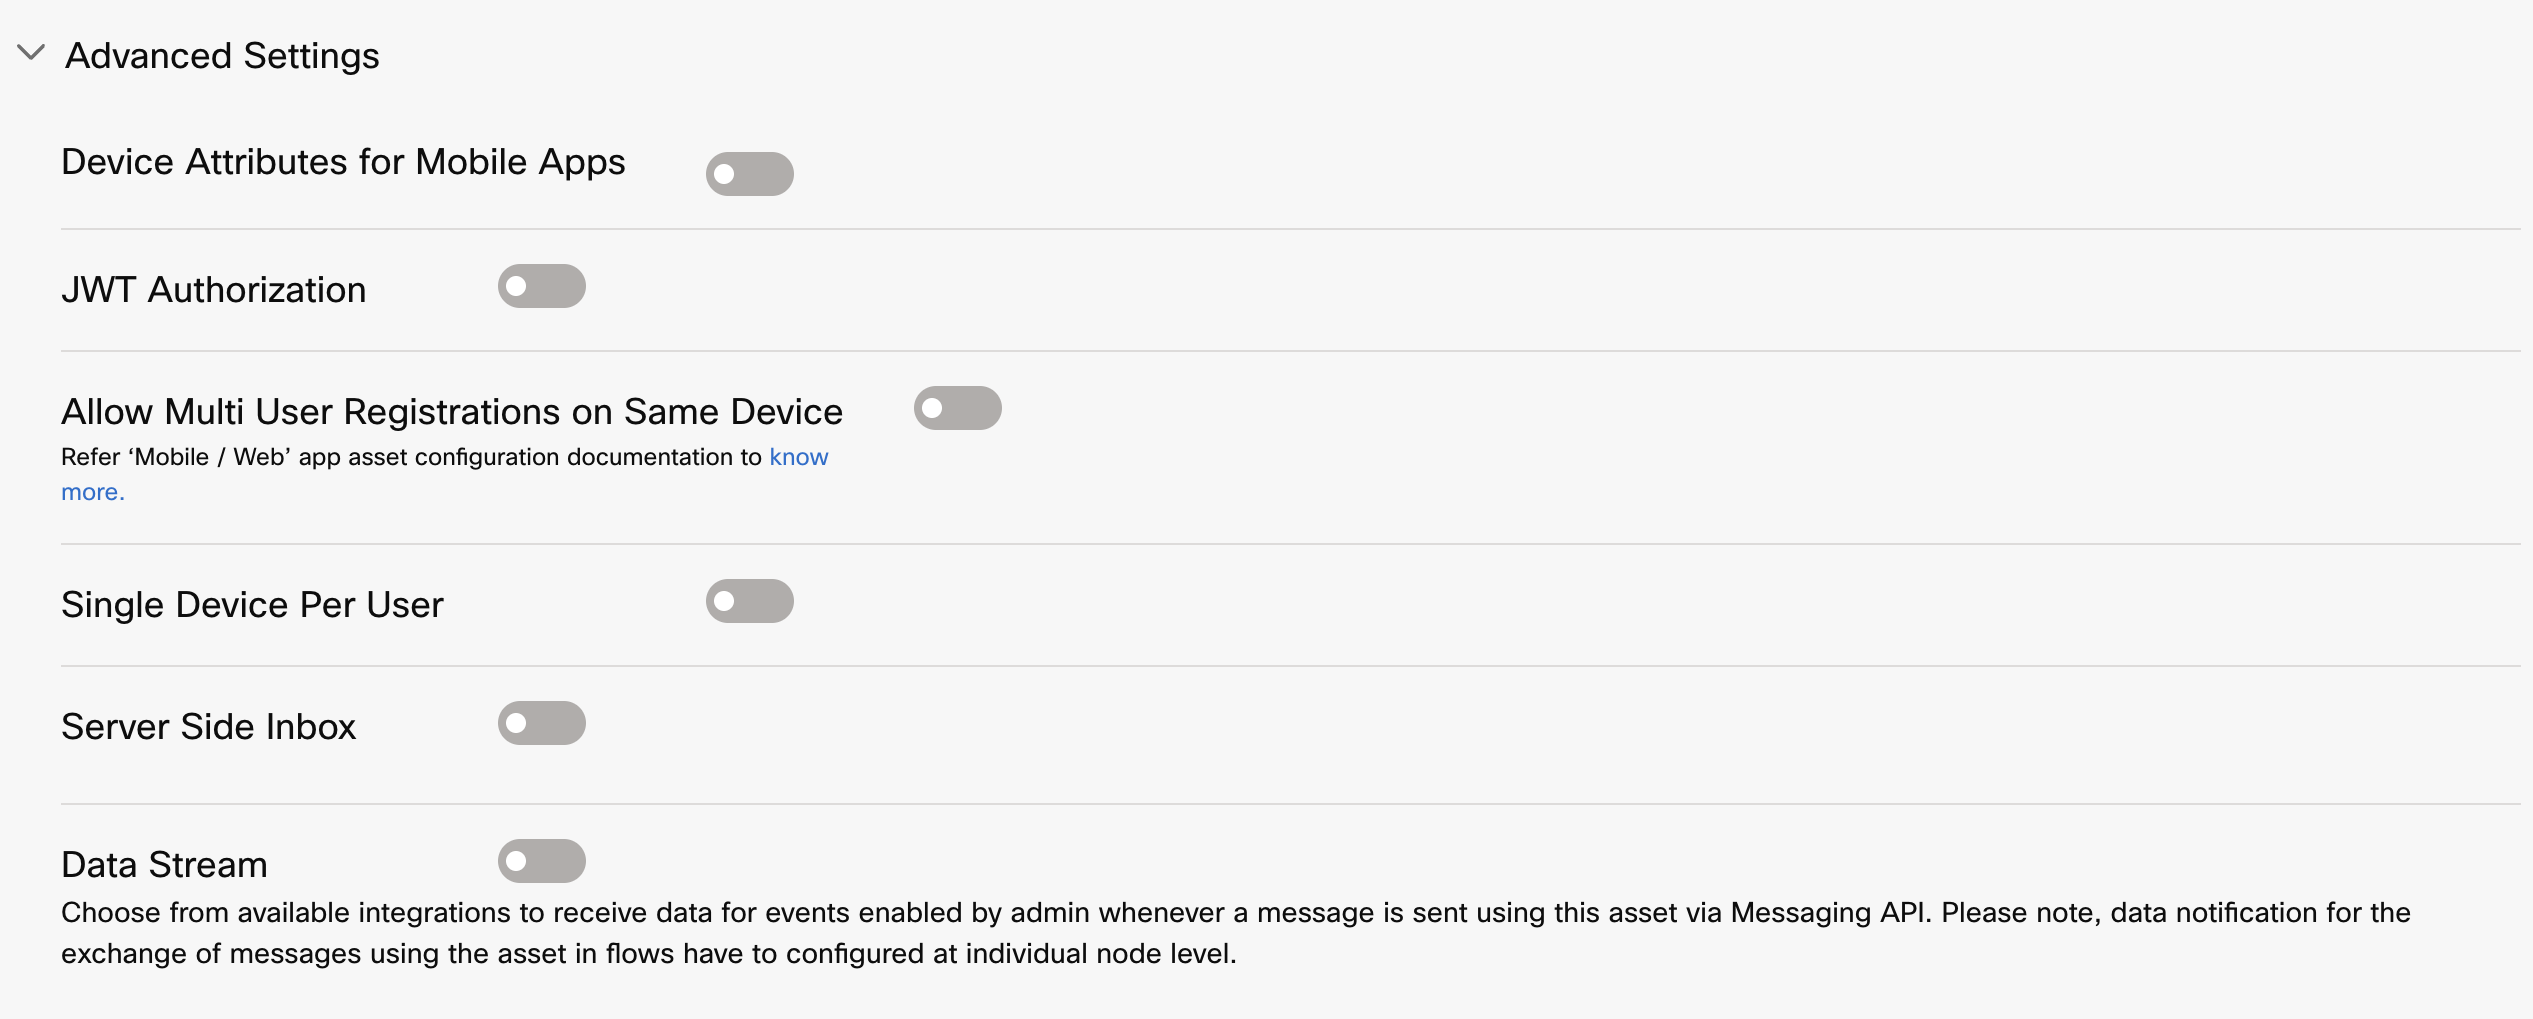
JWT Authorization
Note
For existing App Assets, the Symmetric (Legacy) option is enabled by default, and for new App Assets, the Asymmetric option is enabled by default.
When JWT Authorization is enabled, you will see the option to enter the JWT Secret Key. Enter the JWT secret key.
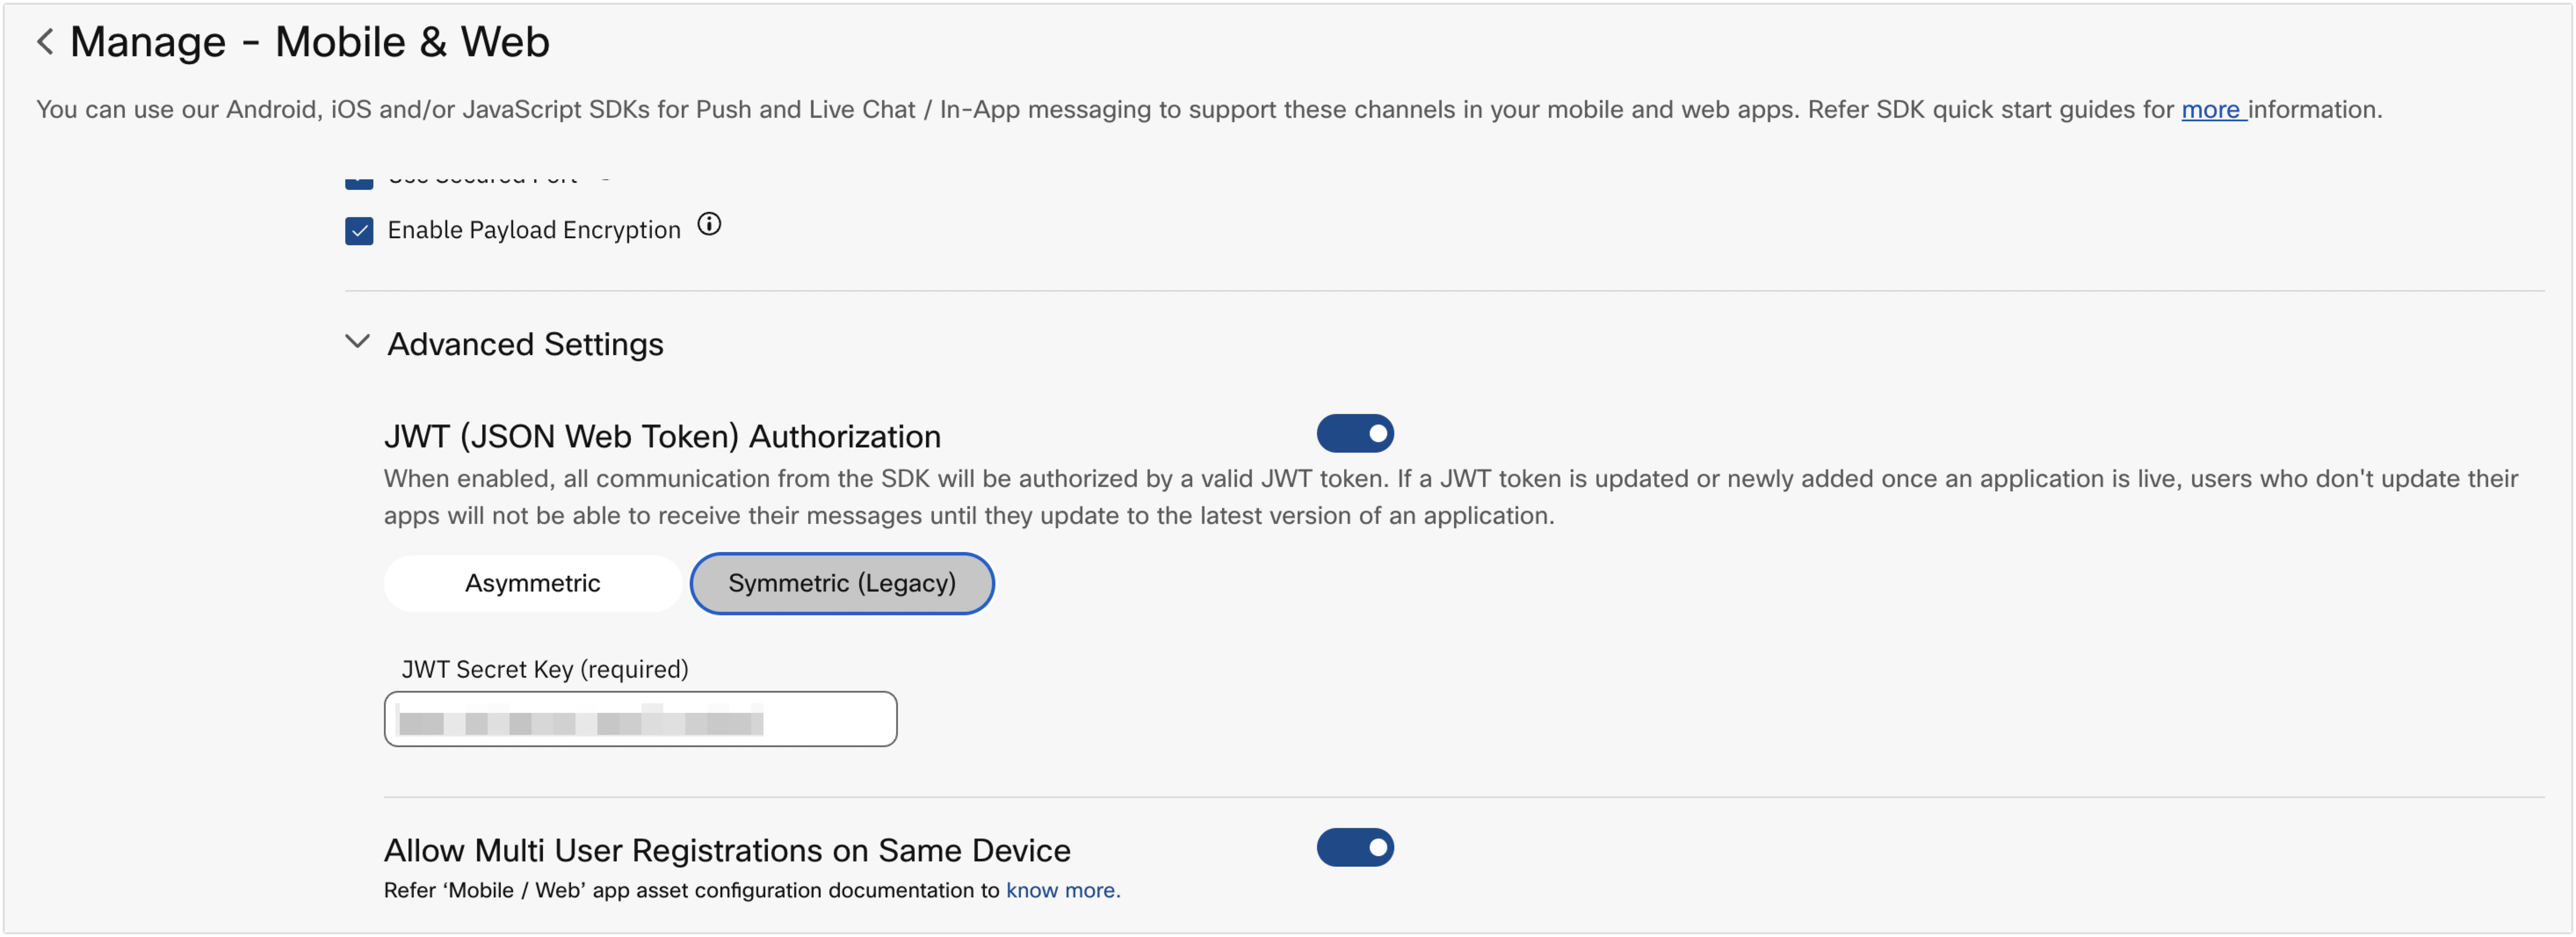
Screenshot of JWT Authorization Section.
For more information, refer to the Public Key Upload Format section below.
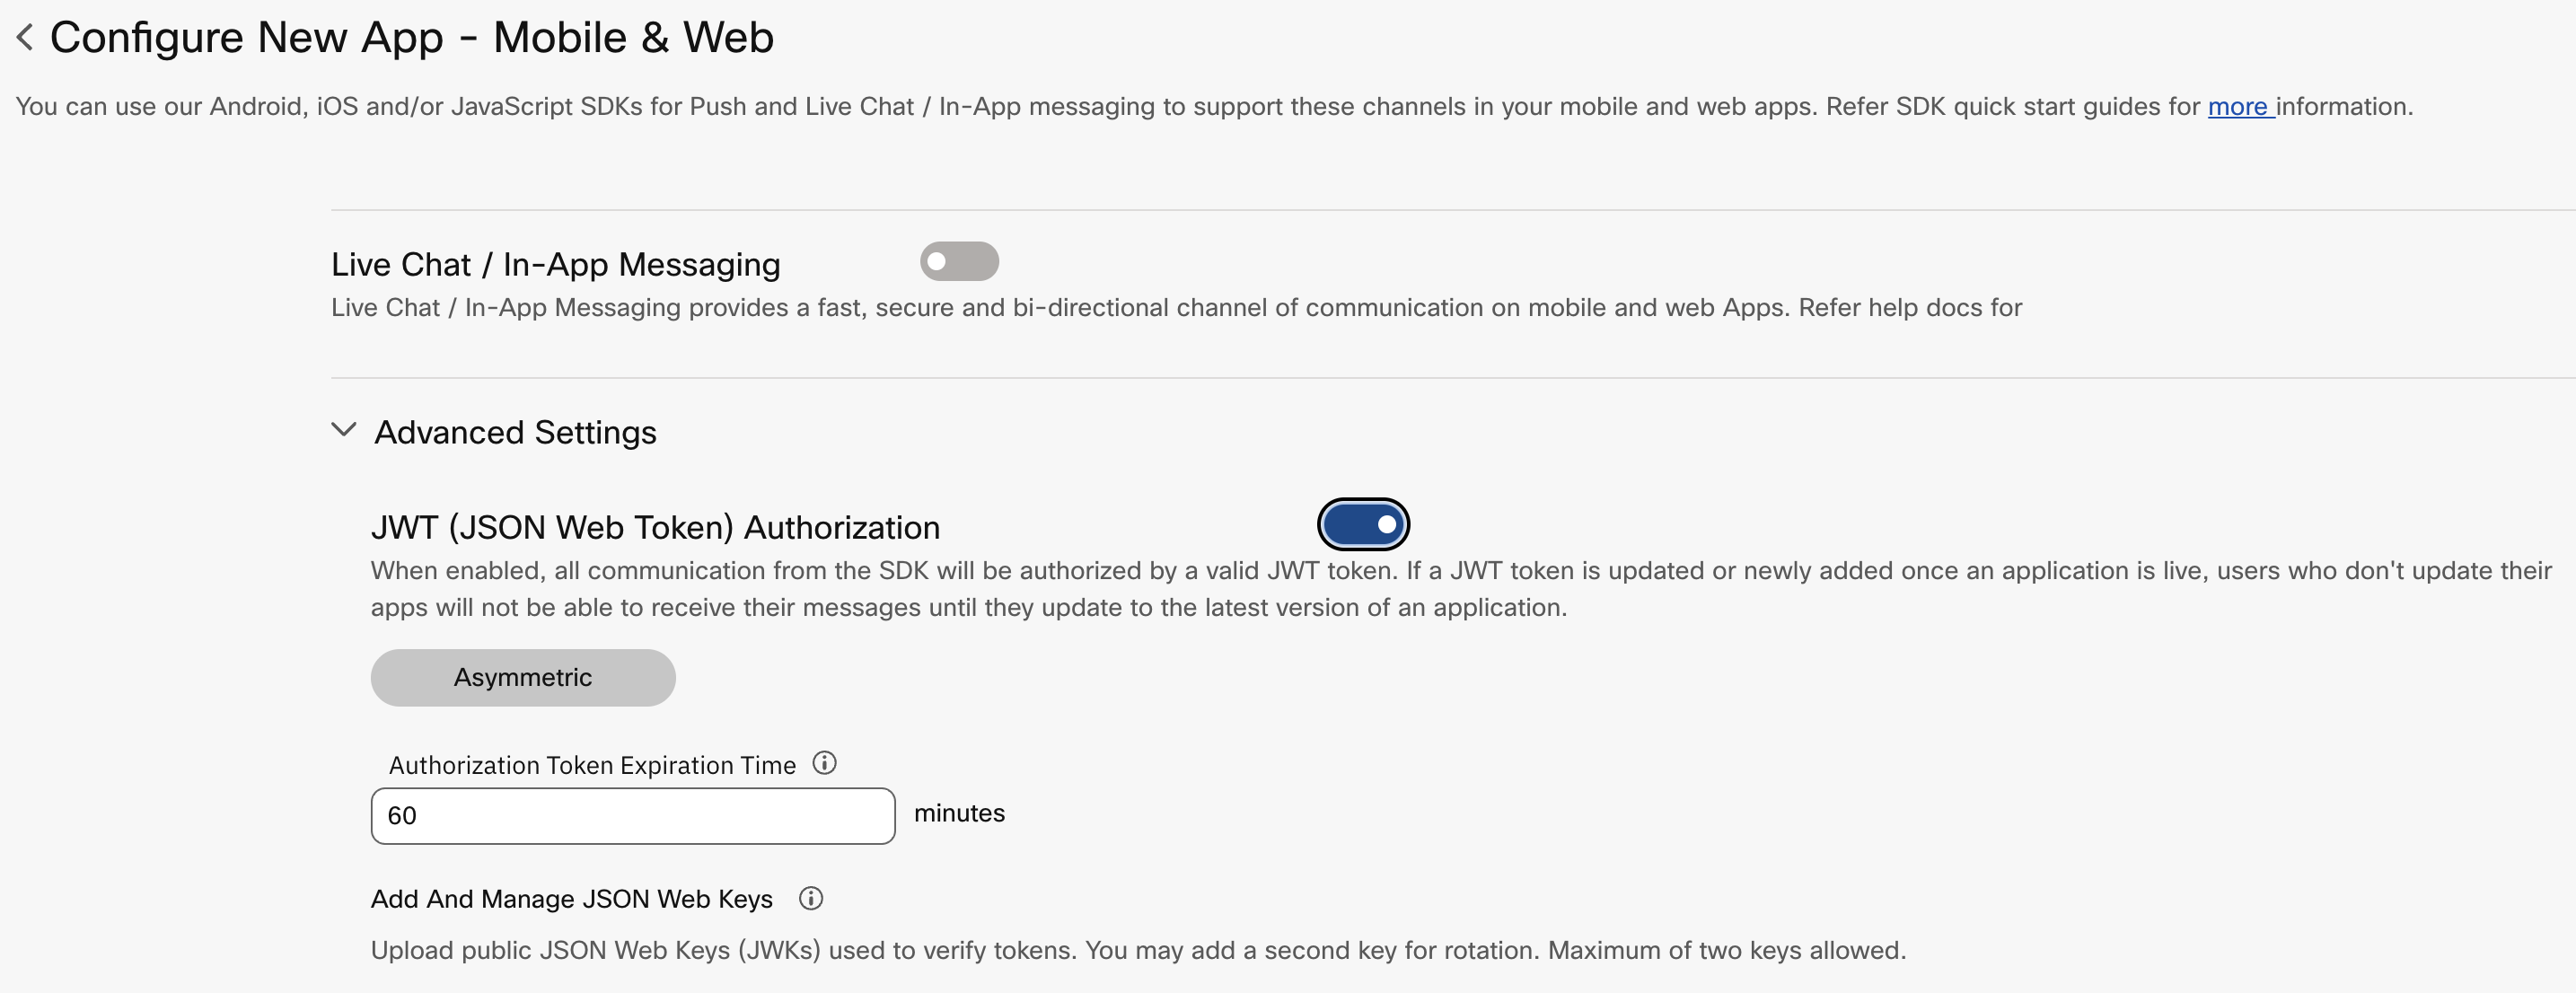
Screenshot of Asymmetric JWT Authorization
Public Key Upload Format
The customer uploads the public key as a JSON Web Key (JWK). The following fields are validated by Webex Connect:
{
  "alg": "RS256",
  "e": "AQAB",
  "key_ops": [
    "verify"
  ],
  "kty": "RSA",
  "n": "<base64url-encoded-rsa-modulus>",
  "use": "sig",
  "kid": "3d10c888f998970e70712bcca8e447fa"
}
JWK properties are defined in RFC 7517, Section 4. Algorithm-specific properties are defined in RFC 7518.
| Property name | Description |
|---|---|
| alg | The specific cryptographic algorithm used with the key. |
| e | The exponent for the RSA public key, represented as a Base64urlUInt-encoded value. |
| key_ops | Specifies the operation for which the key is intended to be used. The supported value is verify, which indicates that the key is used to verify digital signatures. See RFC 7517, Section 4.3. |
| kty | Identifies the cryptographic algorithm family used with the key. For this JWK, the value is RSA. See RFC 7517, Section 4.1 |
| n | The modulus for the RSA public key, represented as a Base64urlUInt-encoded value. |
| use | Specifies the intended use of the public key. The value sig indicates that the key is intended for signature verification. See RFC 7517, Section 4.2. |
| kid | The key identifier used to match a specific key, for example, during key rotation. See RFC 7517, Section 4.5. |
- Finally Click on Save to complete your app asset creation process and click the back button, to land on the apps page. You can now see your app listed with an App-ID.
You'll have to embed this APP ID in your app code. You can learn more about it in Quickstart guides available in each SDK documentation.
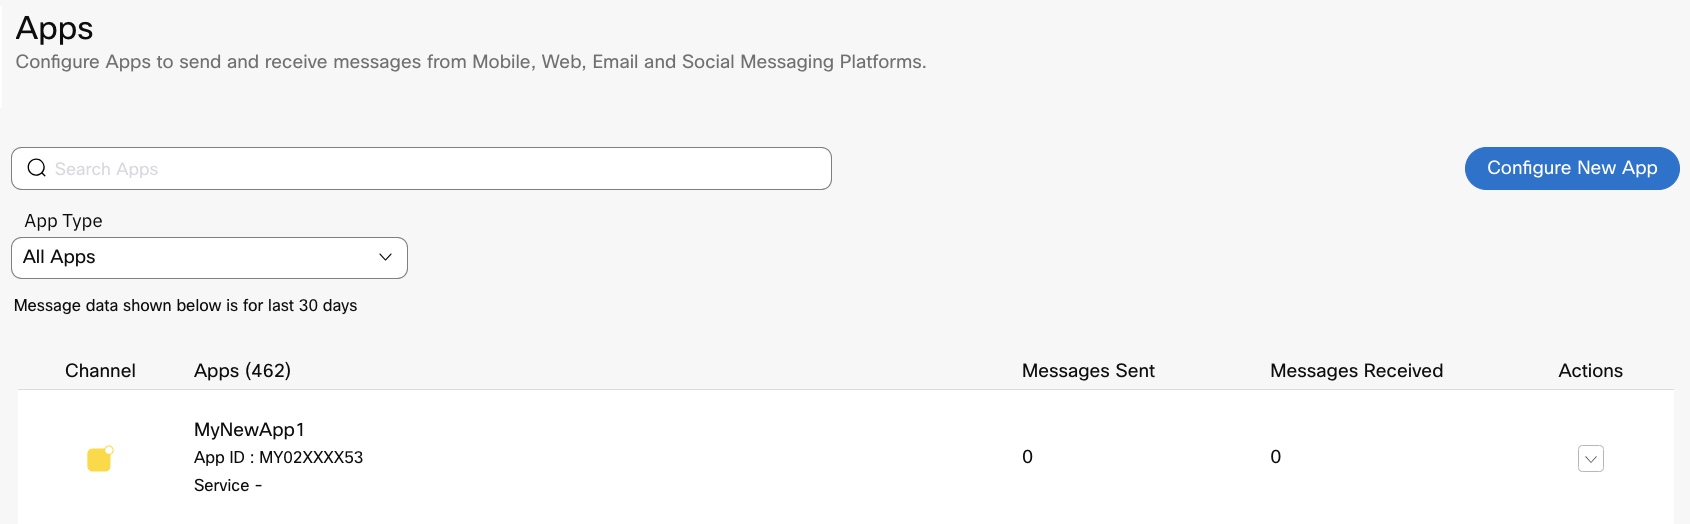
Screenshot of Apps Page.
To configure a project, visit Project Setup
Updated about 1 month ago