
JavaScript SDK Quickstart Guide
Getting Started
- Add Web Application in Webex Connect
- Setup FCM for Chrome and Firefox Browsers
- Download and Integrate JavaScript SDK in your Website
- Code Integration
1. Add Web Application in Webex Connect
To view how to create Web App Asset, visit Web App Asset in Webex Connect
2. Setup FCM for Chrome and Firefox Browsers
Please follow this link to learn how to set up Firebase Cloud Messaging (FCM) for Chrome and Firefox browsers.
3. Download and Integrate JavaScript SDK in your Website
To download and integrate the JavaScript SDK into your website, please refer to the detailed instructions provided here.
4. Code Integration
Here is a summary of the process required to implement Live Chat Messaging.
- Include SDK
- Startup plugin
- Check if user is already registered
- Register user
- Register Listener for Live Chat Messaging
- Connect
- Create a thread
- Send message using publishMessage
1. Include SDK
If you have downloaded the SDK files up to version v1.7.x, Please refer to the Include SDK section on Integration Steps for JavaScript until v1.7.x.
How to integrate the latest JavaScript SDK
- To download the JavaScript SDK, go to GitHub page. Download and extract
dist.zip.- Create an
assets/jsfolder in your project. - Copy
webex-connect-sdk.min.jsandimi-environment.jstoassets/js/folder.
- Create an
- Move the service worker file
sw.min.jsto root of your project. You can specify a subfolder if needed as per steps outlined in Managing Assets page. - Include dependencies.
<script src="https://code.jquery.com/jquery-1.12.4.js"></script> - For Push Notifications, include Firebase SDK files
- Include supported Firebase SDK files
<script type="text/javascript" src="https://www.gstatic.com/firebasejs/11.1.0/firebase-app-compat.js"></script> <script type="text/javascript" src="https://www.gstatic.com/firebasejs/11.1.0/firebase-messaging-compat.js"></script> - Include
manifest.jsonfile.
Copy the extractedmanifest.jsonfromdist.zipinto the sameassets/manifest/folder./assets/manifest/manifest.json
- Include supported Firebase SDK files
- Include JavaScript SDK files in your HTML page:
<script src="assets/js/imi-environments.js"></script>
<script type="text/javascript" src="assets/js/webex-connect-sdk.min.js"></script>
imi-environments.js file is available from the Downloads section using Webex Connect UI. Refer to Create a Mobile App Asset in Webex Connect section for more information.
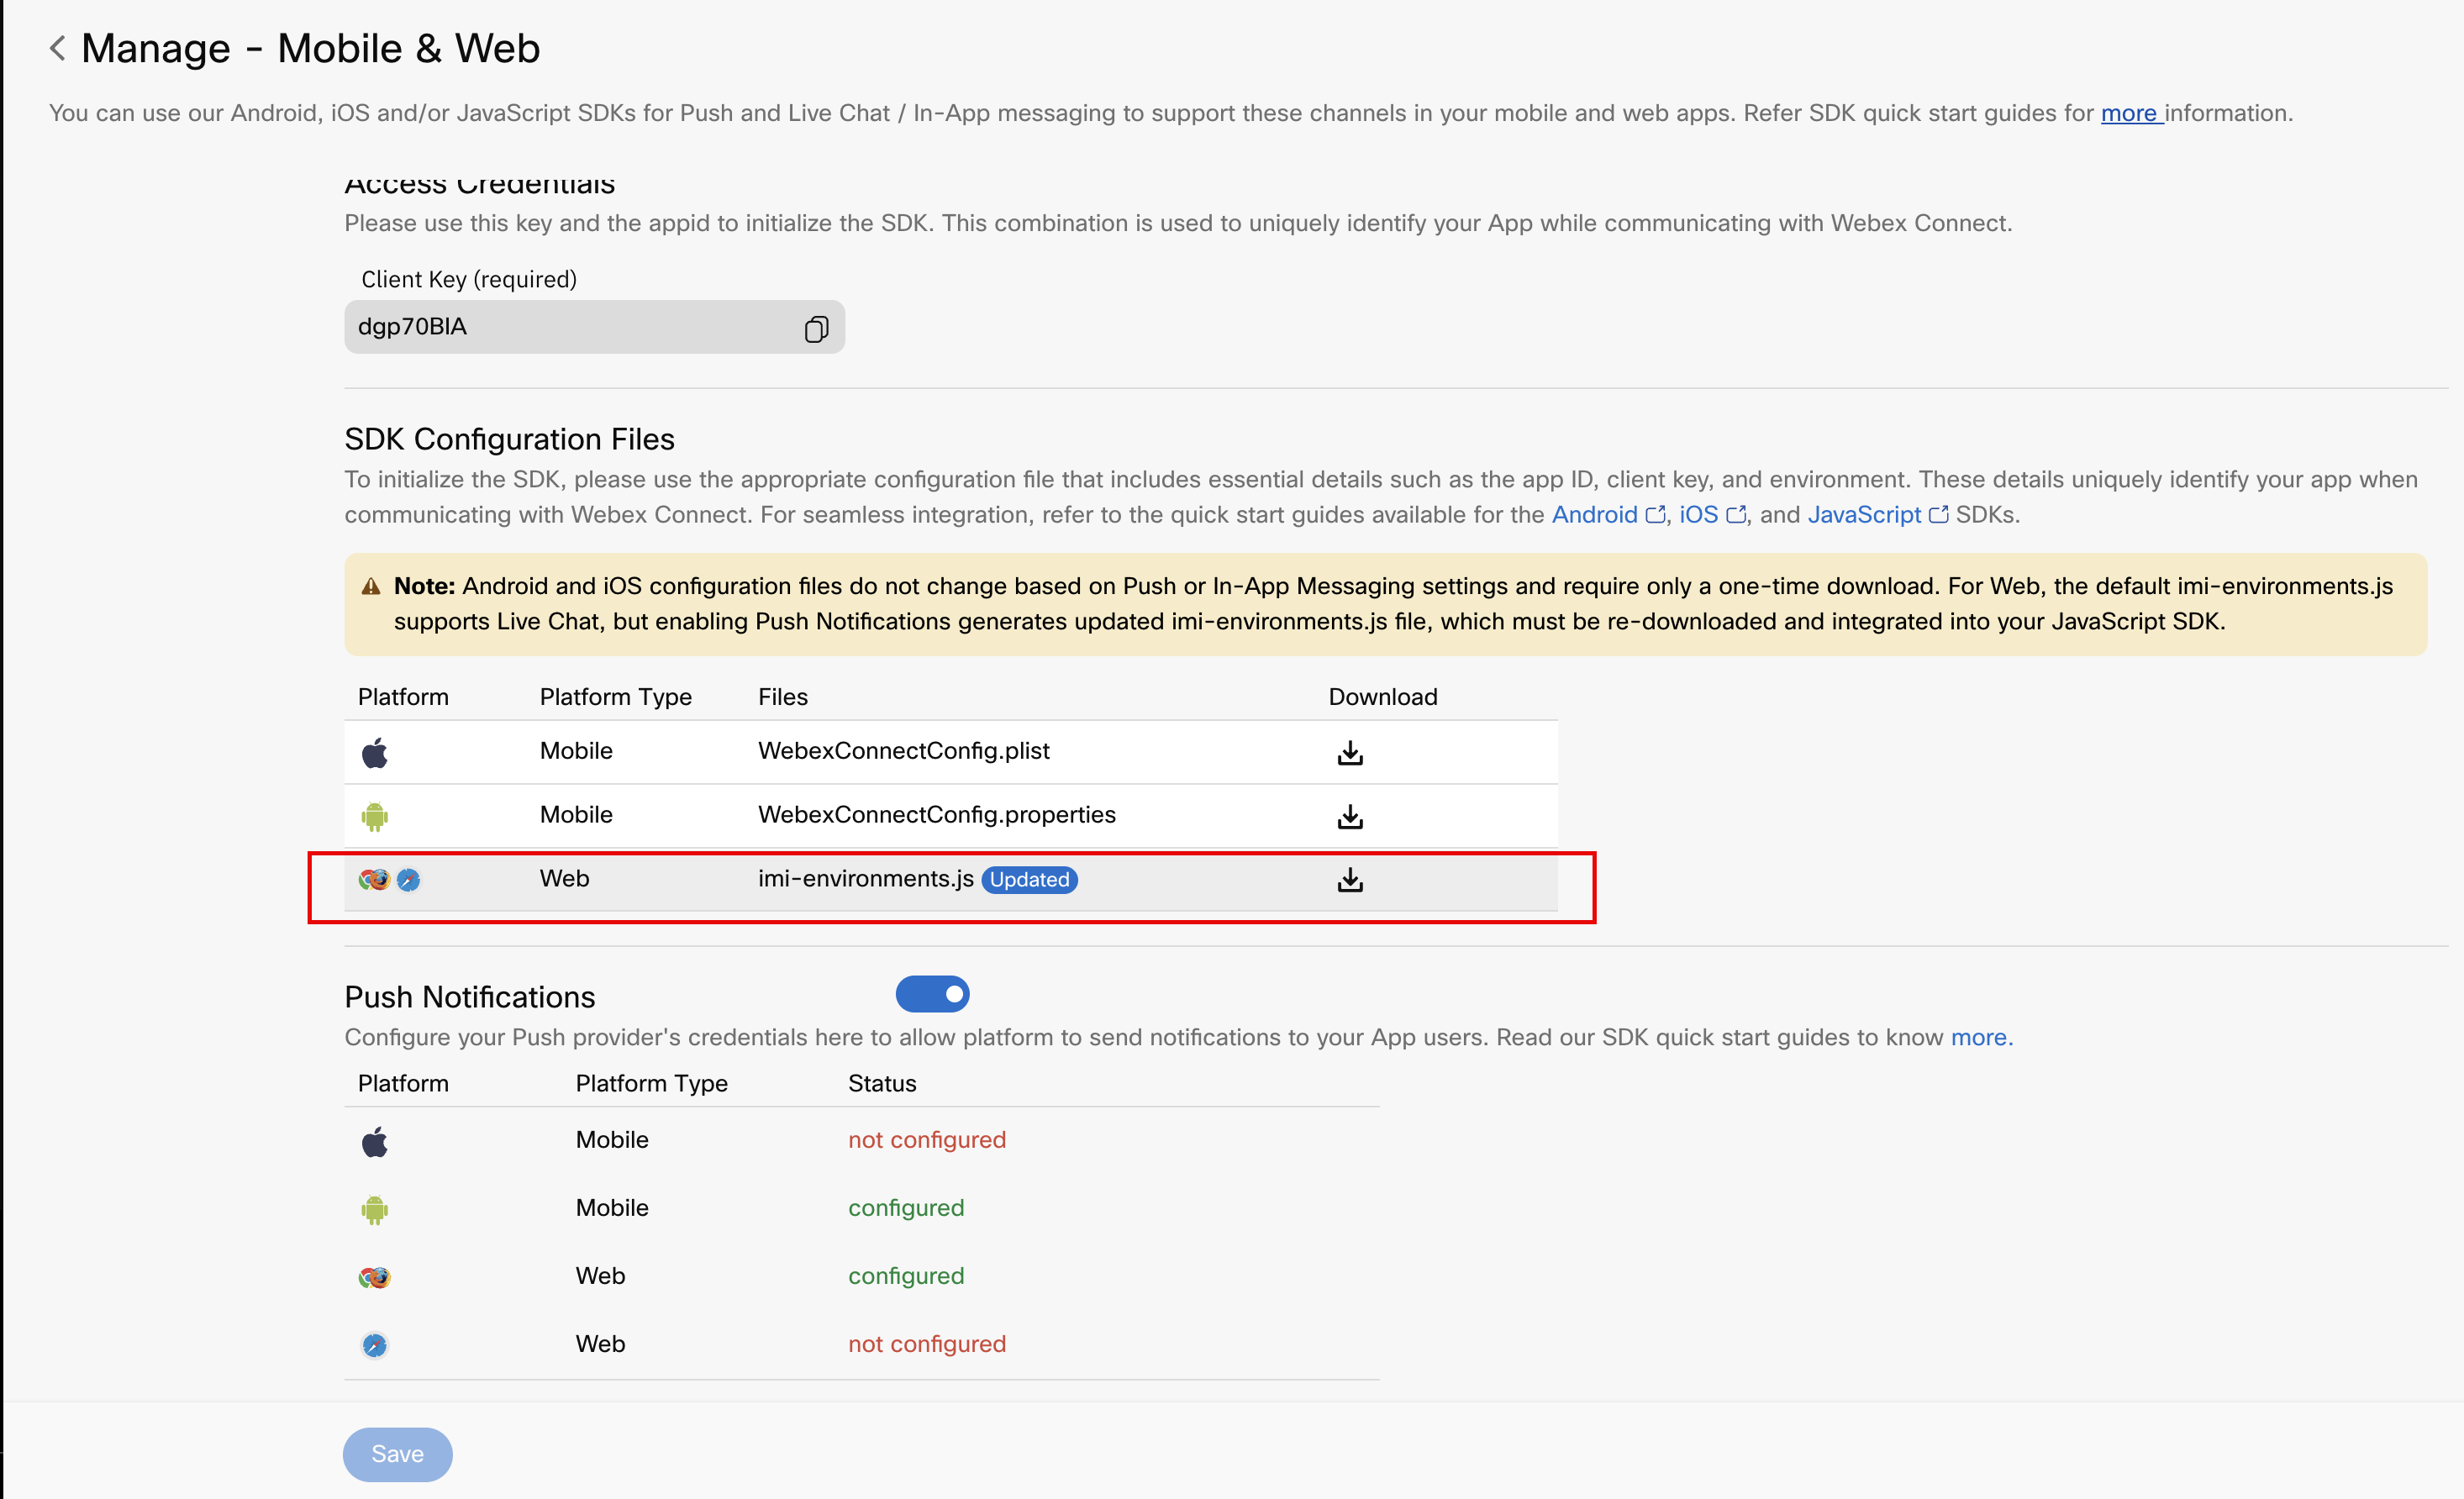
Download the imi-environemnt.js file
Migrate from previous SDKs
If you have downloaded the SDK files up to version v1.7.x, please refer to the Migrate from previous SDKs page for more information.
2. Startup plugin
In Browser Console, verify if the plugin is available by typing IMI. It should output this:

Screenshot of Startup plugin.
Follow below step to setup Live Chat Messaging
Call plugin’s startup() method:
IMI.IMIconnect.startup();
Note
Refer Managing Assets for managing multiple assets and paths.
startup(callback, inputConfig)
startup(callback, inputConfig)Initializes the SDK. The method now accepts an optional inputConfig object that provides the full environment configuration at runtime, removing the requirement to define environments in imi-environments.js beforehand.
Syntax:
IMI.IMIconnect.startup(callback, inputConfig)
Parameters
| Parameter | Type | Default | Description |
|---|---|---|---|
callback | Object | null | Startup callback object. |
inputConfig | Object | undefined | Optional runtime environment configuration. |
Example - Single app (legacy, unchanged):
IMI.IMIconnect.startup();
Example - With dynamic config:
var config = {
    asset: {
        appId: "YOUR_APP_ID_A",
        appSecret: "< your App Secret here >",
        pathConfig: { assetPath: "/assets/", root: "/" }
    },
    imiclient: {
        authdomain: "https://your-auth-domain.com",
        rtmsdomain: "wss://your-rtms-domain.com",
        shouldRequestNotificationPermission: true,
        config: {
            apiKey: "< your Firebase API key >",
            projectId: "< your Firebase project ID >",
            messagingSenderId: "< your sender ID >",
            appId: "< your Firebase app ID >"
        }
    },
    sw: {
        config: {
            appid: "YOUR_APP_ID_A",
            serverUrl: "https://your-server.com"
        }
    }
};

IMI.IMIconnect.startup(null, config);
Note
When
inputConfigis provided, thetargetfield inimi-environments.jsis ignored. Eachstartup()call creates an isolated app instance with its own Service Worker scope, storage namespace, and messaging connection.
3. Check if user is already registered
IMI.IMIconnect.isRegistered()
4. Register user
var userID = 1;
var deviceID = userID + new Date().getTime(); //any random no.
var deviceProfile = new IMI.ICDeviceProfile(deviceID, userID);
var registerCallback = {
   onSuccess: (msg) => {
      console.log(msg);
   },
   onFailure: (err) => {
      console.log(err);
   },
};
IMI.IMIconnect.register(deviceProfile, registerCallback);
Note
The SDK automatically unregisters the app user if the app isn't opened for over 40 days. To ensure a seamless user experience, always check if the user is registered by calling isRegistered whenever the app launches, and if not registered, register the user with register. For further details of the profile clean up process, including how profiles are deemed inactive, please see this article.
5. Register Listener for Live Chat Messaging
var msgCallBack = {
   onConnectionStatusChanged: (statuscode) => {
      console.log('onConnectionStatusChanged to', statuscode);
   },
   onMessageReceived: (message) => {
      console.log('onMessageReceived ', message);
   }
};
var messaging = IMI.ICMessaging.getInstance();
messaging.setICMessagingReceiver(msgCallBack);
6. Connect
In registration onSuccess callback, add below code:
var messaging = IMI.ICMessaging.getInstance();
if (!messaging.isConnected())
   messaging.connect();
Create a thread
createThread(title) {
   var title = title || "New Conversation";
   var thread = new IMI.ICThread();
   thread.setTitle(title);
   thread.setStatus(IMI.ICThreadStatus.Active);
   thread.setType(IMI.ICThreadType.Conversation);
   var messaging = IMI.ICMessaging.getInstance();
   messaging.createThread(thread, createThreadCallBack);
}
createThreadCallBack = {
   onSuccess: (threadObj) => {},
   onFailure: (err) => {

   },
};
Send message using publishMessage
var publishMessageCallback = {
   onSuccess: function (msg) {
      console.log("message sent", msg);
   },
   onFailure: function (errormsg) {
      console.log("failed to send message", errormsg);
   },
};

function publish() {
   var text = "Sample message text";
   var message = new IMI.ICMessage();
   message.setMessage(text);
   message.setThread(icThreadObj);
   var messaging = IMI.ICMessaging.getInstance();
   messaging.publishMessage(message, publishMessageCallback);
}
To set up push notifications, please follow this link: Sending Push Messages to Customers
New Method: uninit
uninitTears down the current app instance gracefully without reloading the page. Use this method for app switching or per-app logout. This method returns a promise, which should be awaited before the app switch.
Syntax:
IMI.IMIconnect.uninit()
Parameters: None.
Behavior
- Deregisters the current tab from the Service Worker's client map.
- Removes the Firebase messaging app instance.
- Clears all in-memory state, including tokens, config, flags, and listeners.
- Does not unregister the device from the server. The device profile persists.
- Does not explicitly disconnect MQTT. The Service Worker auto-disconnects when no tabs remain for the app.
Note:
uninit()is designed for app switching without de-registering the account. Other tabs using the same account are not affected. Background push notifications continue to work because the device remains registered on the server and the Service Worker stays active.
Example - App switching:
// Tear down current app
await IMI.IMIconnect.uninit();

// Initialize a different app
IMI.IMIconnect.startup(null, imiEnvironments["OTHER_APP"]);
Example - Per-app logout (without device unregister):
await IMI.IMIconnect.uninit();
// User stays on page, app state cleared, ready to init again
| Method | Purpose | Server impact | When to use |
|---|---|---|---|
uninit() | Tear down client-side instance only | None. The device stays registered. | App switching, temporary teardown |
shutdown() | Unregister device from server | Device profile removed | Permanent logout |
Updated 3 months ago