Setup APNS for Safari Browser
Setup APNS for Safari Browser
The following steps will guide you through the process of APNs setup, certificate creation, and configuration.
- Go to the Apple Developer Portal.
- Proceed to Certificates, Identifiers & Profiles. The screen will display all the certificates configured for your applications.
Certificates are configured within the Certificates section.
- Click the + button to add a new certificate. A screen is displayed to select a certificate for your environment.

iOS certificates
- Select the Apple Push Notification service SSL (Production) option.
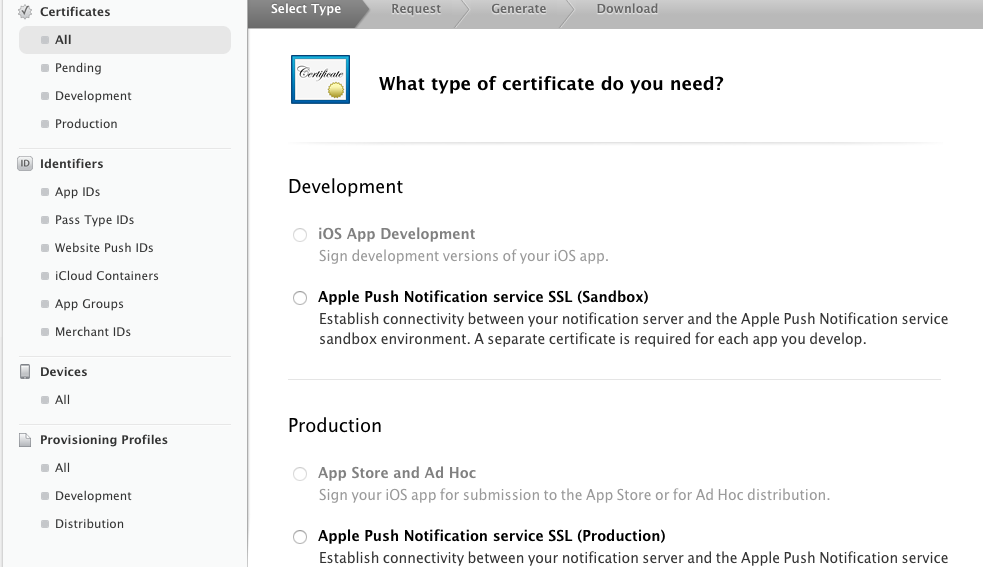
SSLProduction settings
- Select your App ID from the drop-down list.
If an App ID is not available, a new App ID must be created.
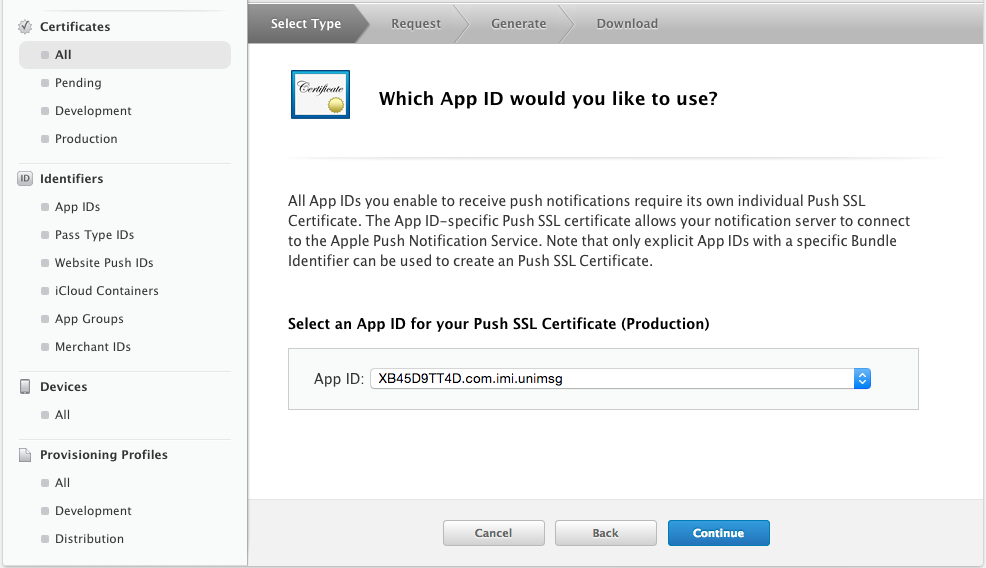
App ID
- Click Continue.
Create Certificate Signing Request (CSR)
- Follow the on-screen instructions to create a Certificate Signing Request, Generate, and Approval.
- Click Continue.
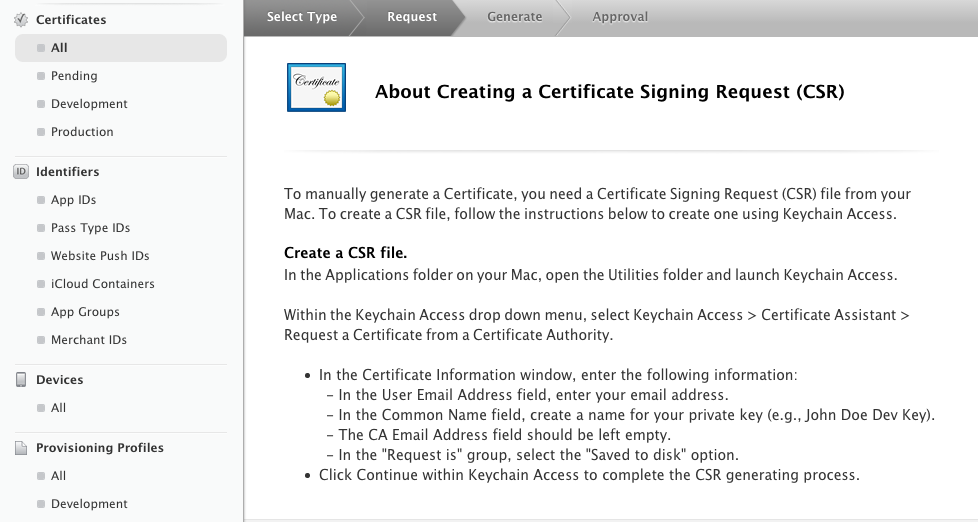
Screenshot of Create Certificate Signing Request (CSR).
Follow the below steps if you need further assistance in Certificate Signing Request, Generate, and Approval explained in the above screen.
Launch Keychain Access
- To launch Keychain Access from an Apple Mac:
a. Open spotlight: cmd + space key.
b. Type Keychain Access. The Keychain Access screen is displayed. - Select Request a Certificate from a Certificate Authority option.
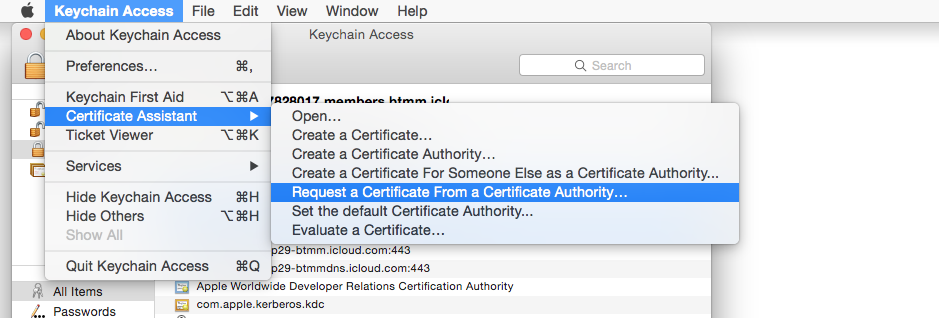
Request a Certificate from a Certificate Authority.
The Certificate Assistant will appear to help you create the request.
Create Certificate
Within the Certificate Assistant complete the following steps:
- Enter the following details for your certificate:
a. User Email Address: Enter an email address that matches with the Apple developer account ID.
b. Common Name: A name for your certificate.
Do not enter CA Email.
- Select Request is: -> Saved to disk option.
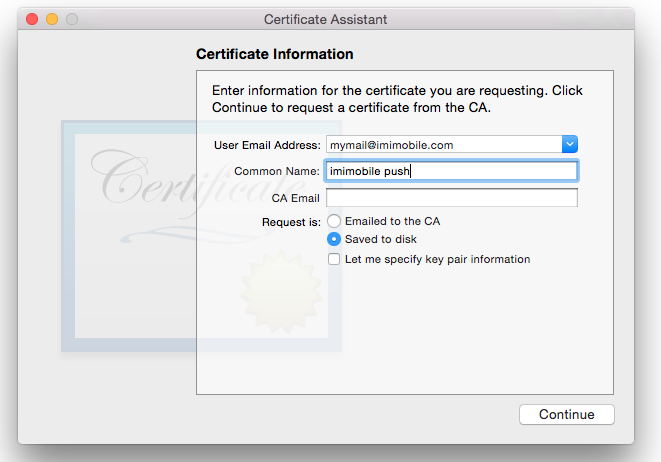
Create certificate
- Click Continue to save the certificate on to your Mac.
Submit Request
To submit a Certificate Signing request, return to the Apple Developer Portal.
- Click Choose File and select the certificate file that was created in the previous step.
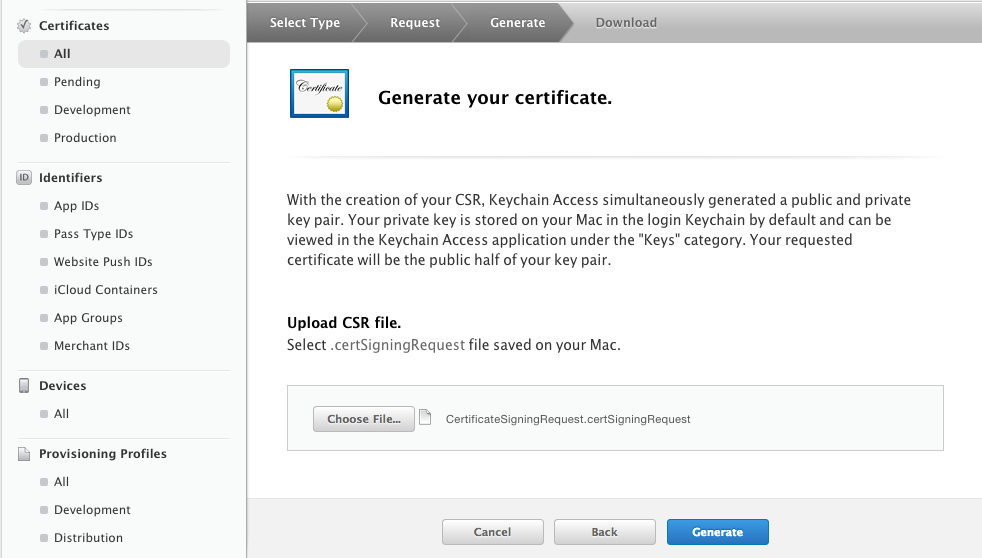
Generate certificate
- Click Generate.
The Apple Push Notification service SSL certificate is generated.
Download Certificate
Once the APNs SSL certificate has been generated it is ready to be downloaded.
- Click Download to download the certificate.
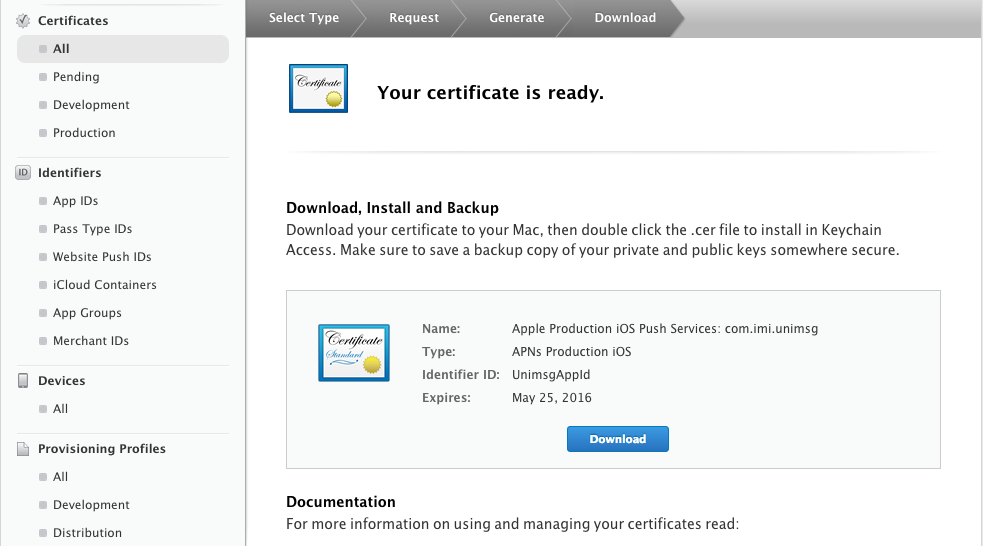
Download Certificate.
Add Certificate to Keychain
- Open the certificate to install it to your Keychain.
- Within Keychain Access:
- Select the login keychain and the category as My Certificates.
- Locate and select the certificate.
- Right-click and select Export .
- Save the certificate as a .p12 file.
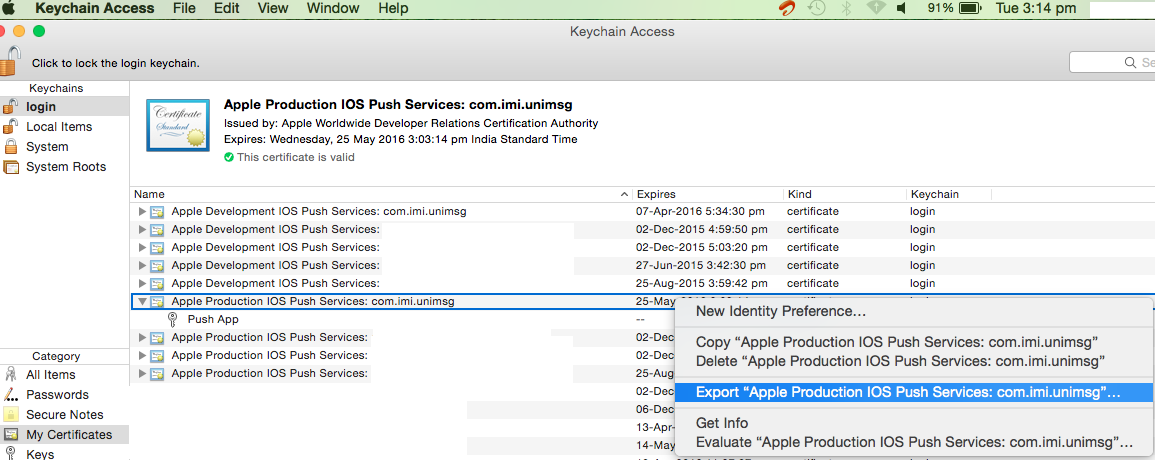
Adding certificate to Keychain
- A password screen appears. Click OK. The certificate must be saved without a password.
When the certificate is created, it is used in Webex Connect to configure push notification service.
Updated 10 months ago
